


How to use Zenithal Highlighting – Eckter from Kings of War
4th Aug 2017
Martin Thirlwell
I was asked if I could write a blog post on the subject of Zenithal highlighting and I was delighted to have a go..
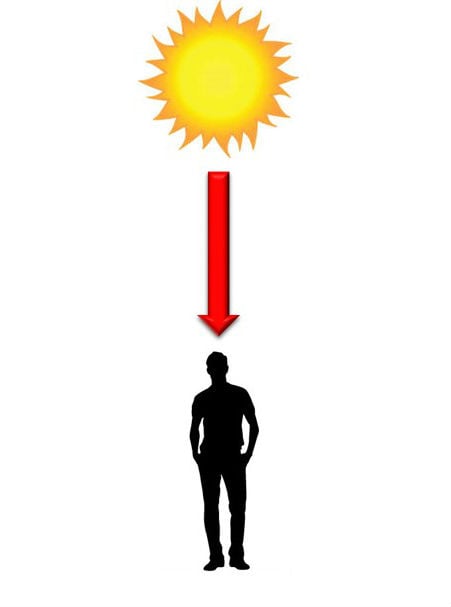
Zenithal highlighting is simply a way of preshading a model. The tricky part is applying the colour afterwards to make sure you don't ruin the preshade. But we'll get to that in a bit... In astronomy the word 'zenith' means the point in the sky or celestial sphere directly above an observer, so in painting terms it means your highlight comes directly from above the miniature.
I decided I would paint up Eckter the Placoderm Defender for the Trident Realms. I am currently painting up the fishmen for my Kings of War summer campaign army so painting this hero was killing two birds with one stone. This superb sculpt has fantastic muscle tone to work with, plus enough character to encourage an interesting paint job!
(You can use spray can paints for each of these steps but I find the airbrush adds a bit more control on where you put the paint.)
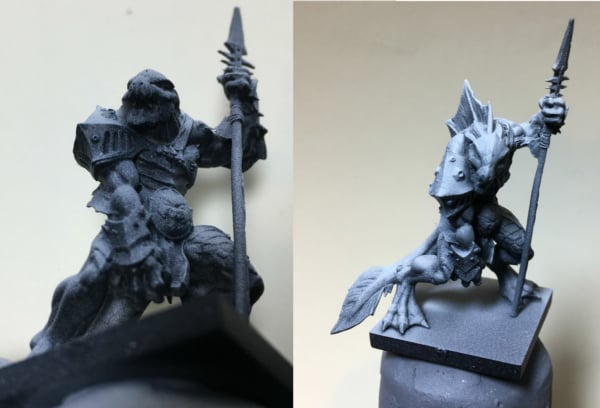
So to start I used my airbrush to do a basic black base coat... Ensuring the underside of the model was suitably covered as this dark side will basically be your shadow for the entire model.
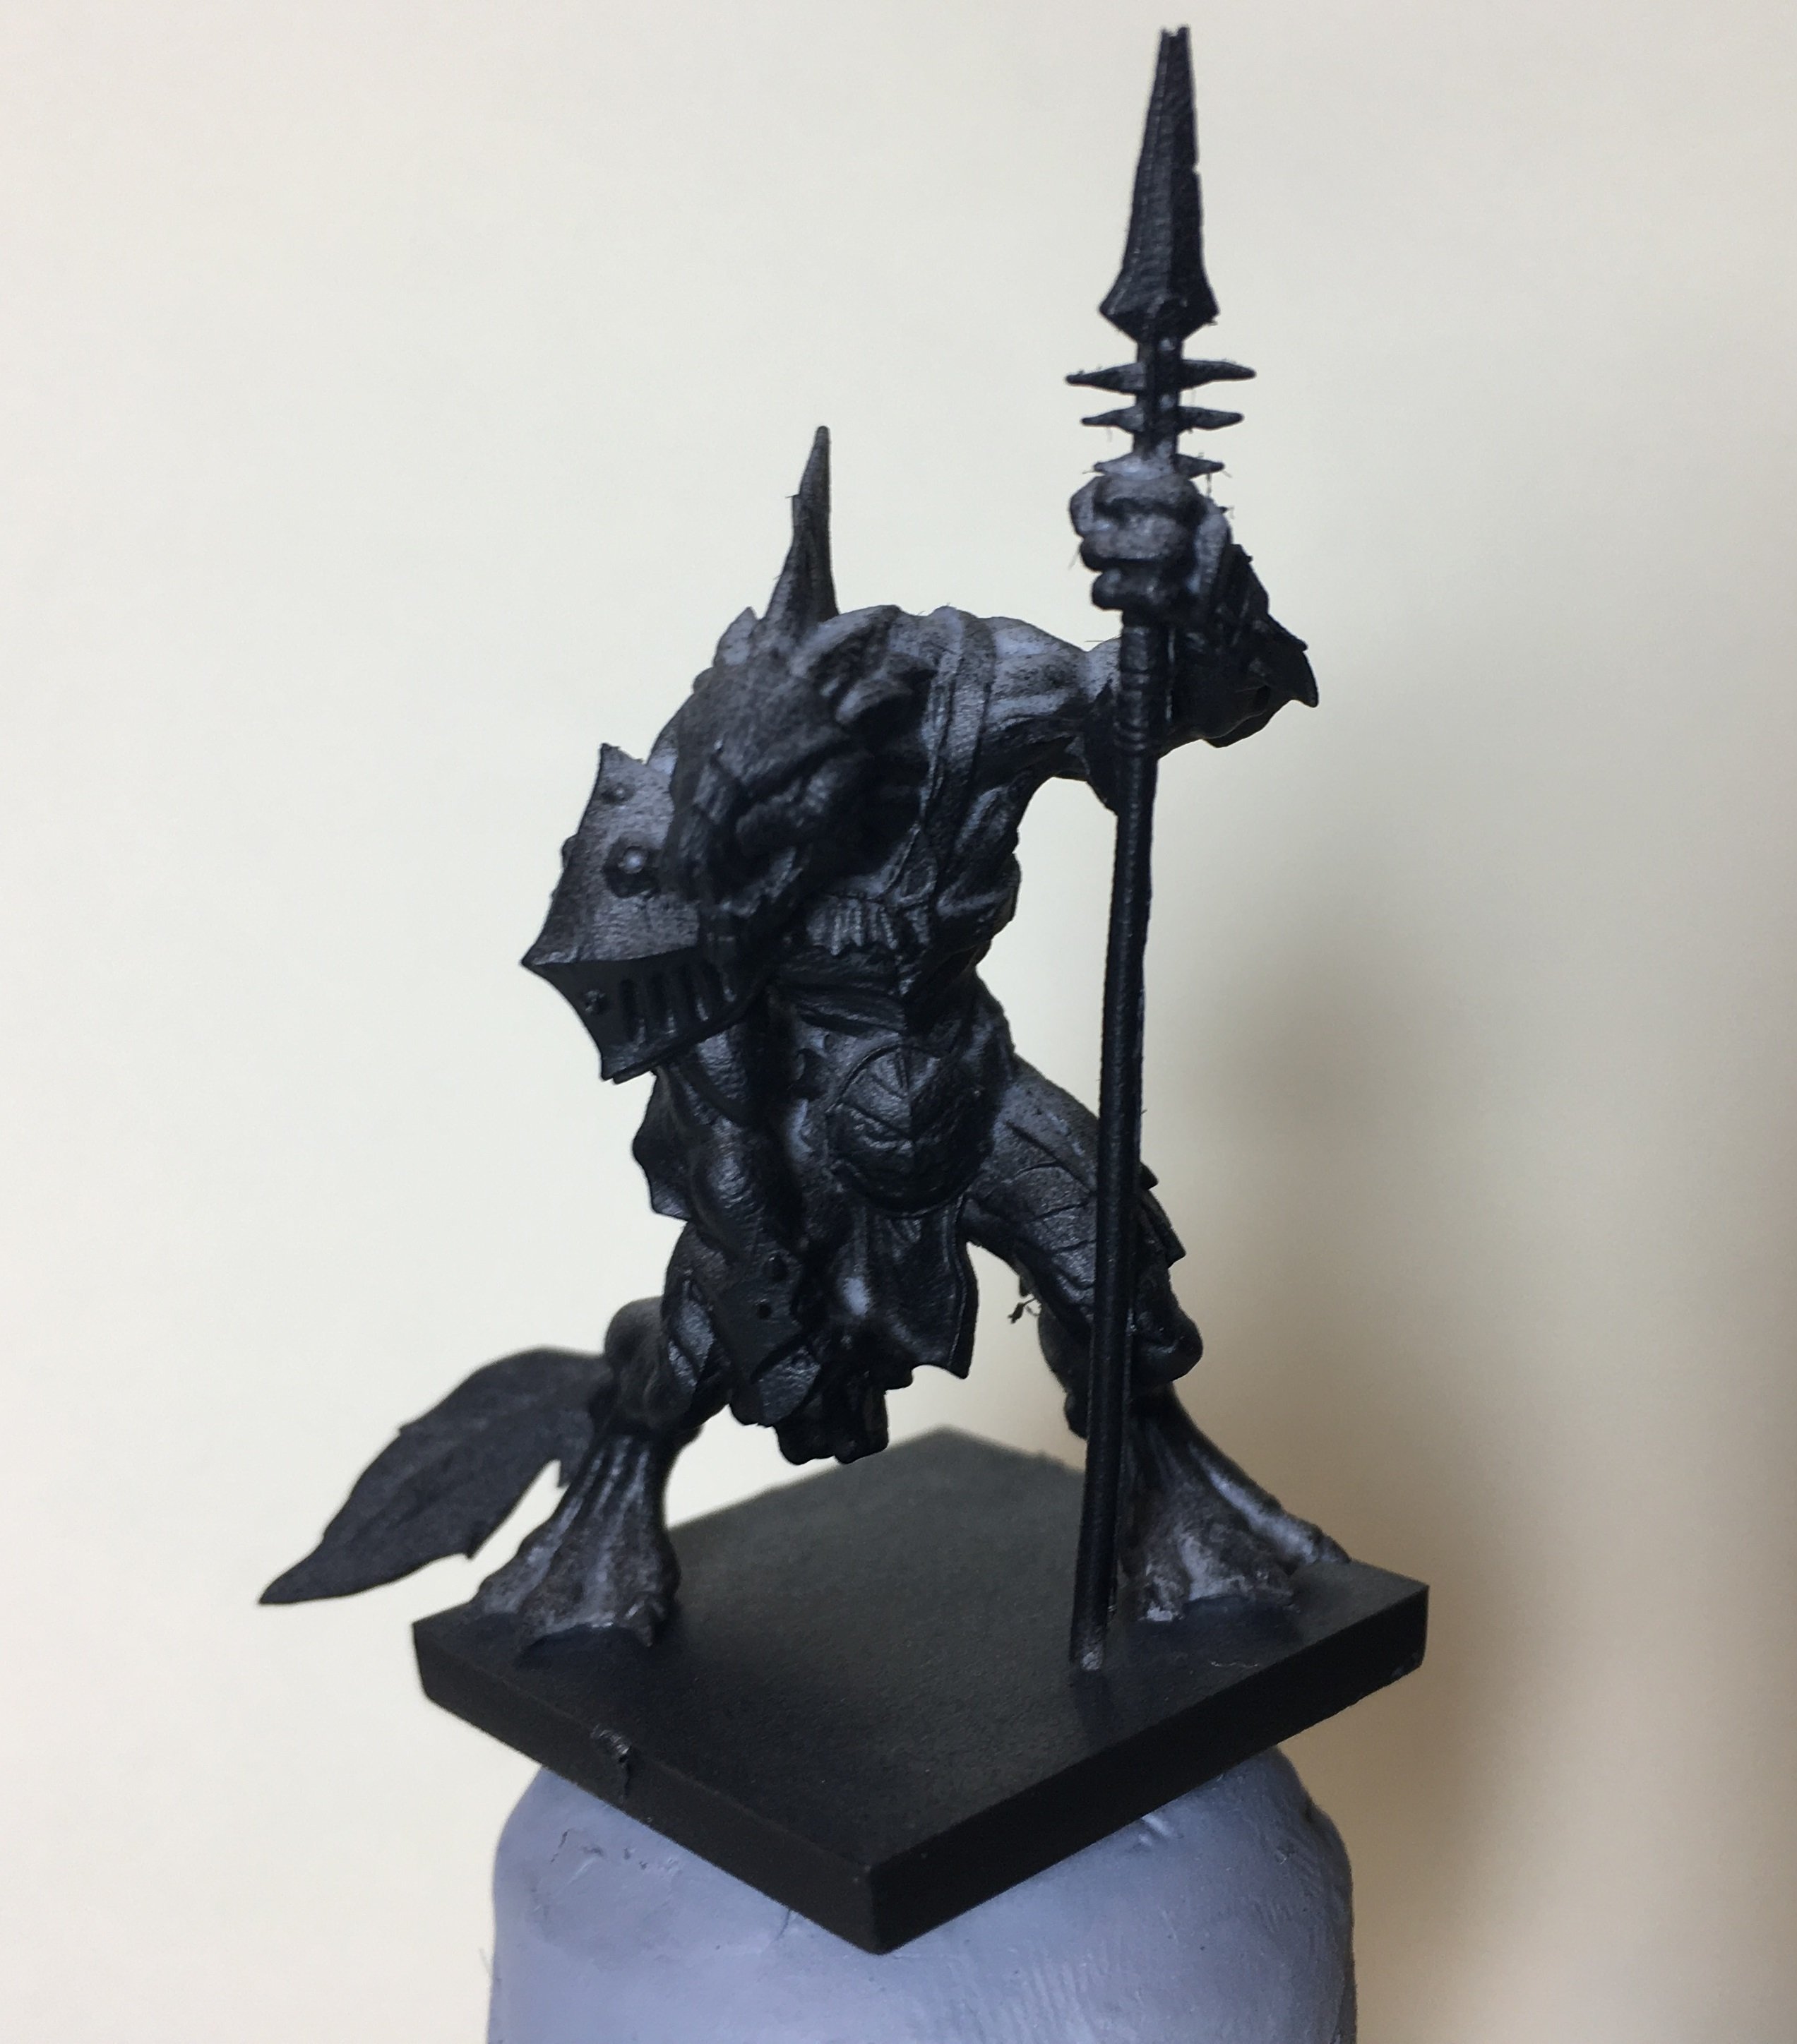
Next we have the first highlight. Here I used Vallejo grey primer in the airbrush and from a 45 degree angle I carefully pick out all the top edges where I want the light to be. Ensuring I don't go overboard and cover up any of the detail with too much paint.
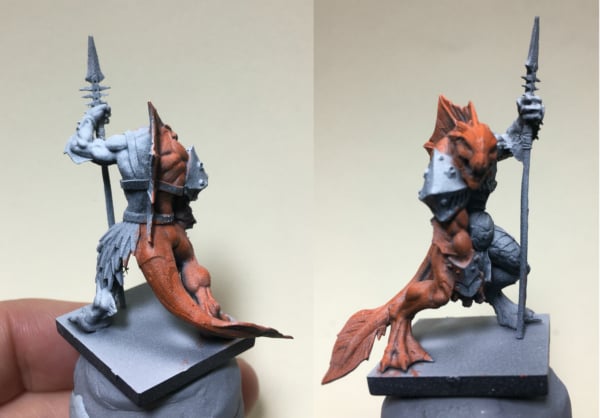
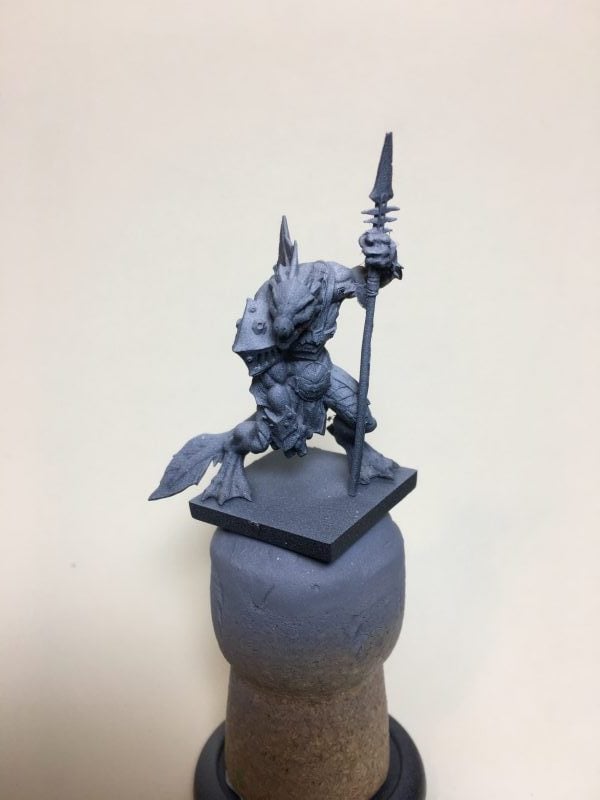 Finally I took some white and, from directly above, I give the brightest highlight really bringing out the muscle tone, top of his head, his tail and tip of armour piece.
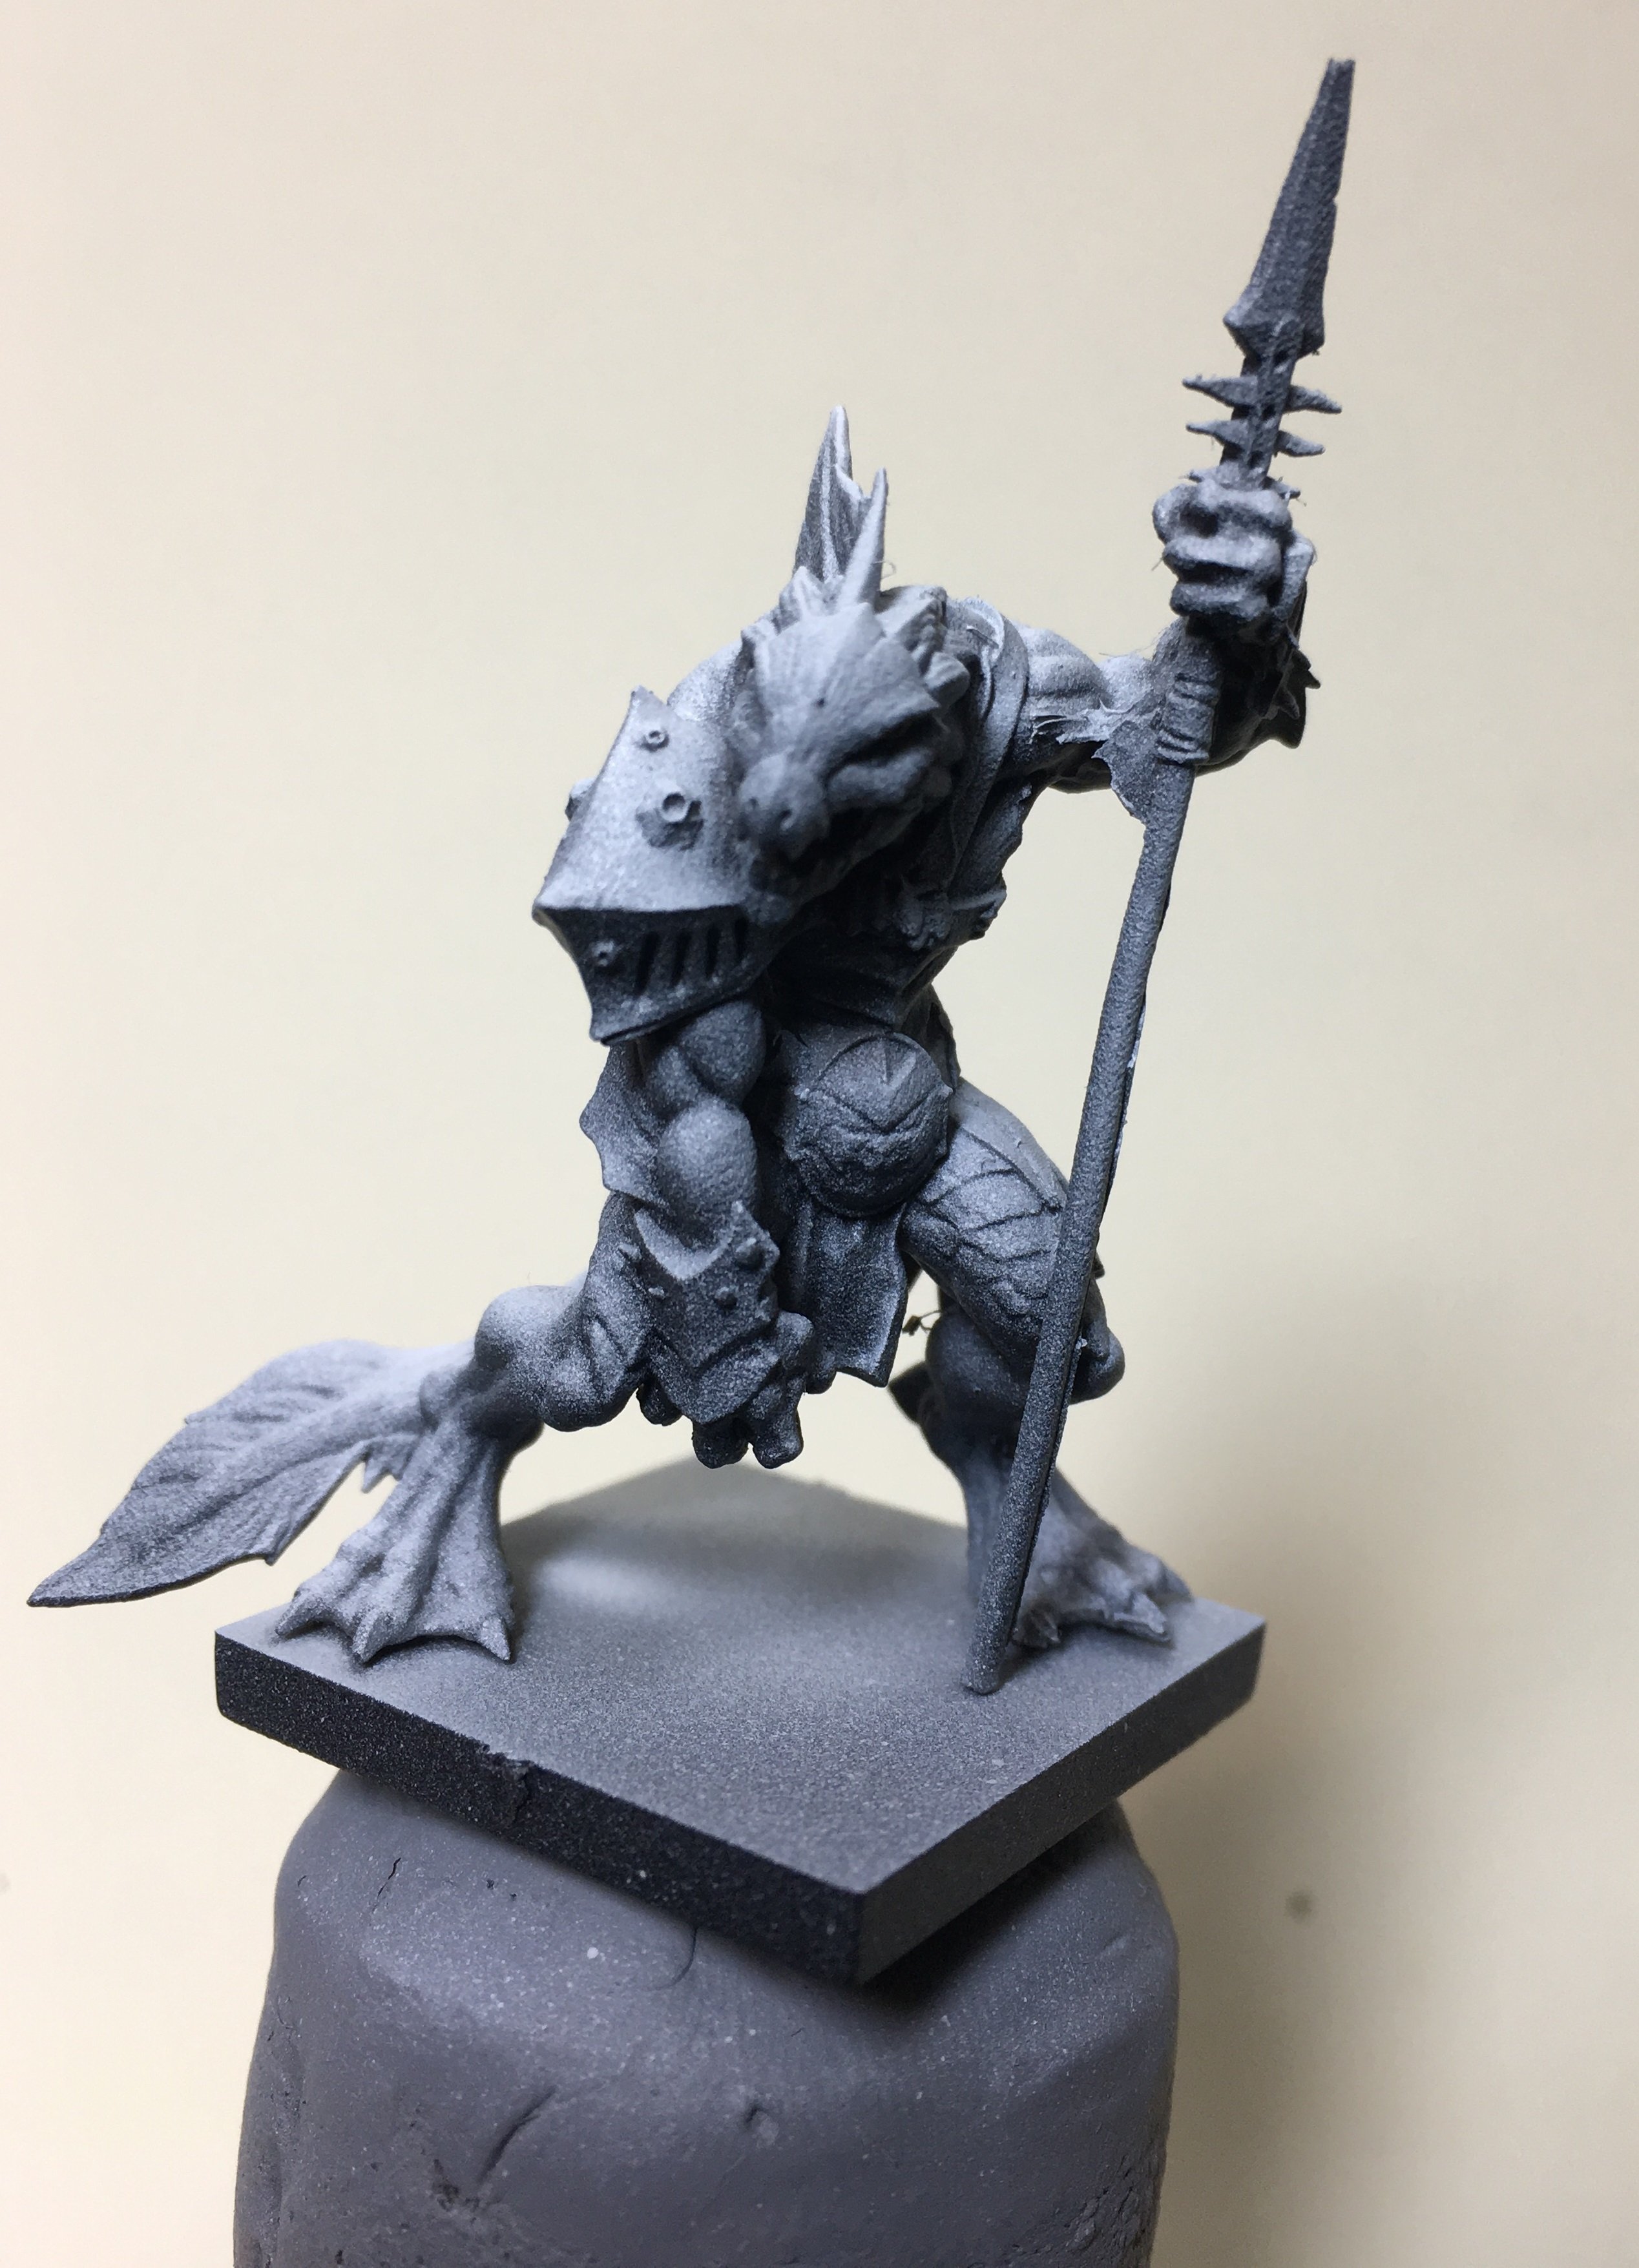
As you will see from these pictures. The underneath is almost solid black but as you move up through the model the transition moves to grey and white.
Now to the fun part. Adding colour. My personal preference for painting over a Zenithal highlight is to use a layering or glazing technique to achieve a smooth finish. Glazing uses the pre-shade to keep the shadows and highlights we have already placed on the model. The picture below shows how simply adding one colour over the pre-shade can offer exciting transitions with little effort.
Glazing is a technique where you use incredibly thin paint (like skimmed milk) and using hardly any paint on your brush you build up layers of paint until you achieve your desired colour. It does take a long time but the end results speak for themselves.
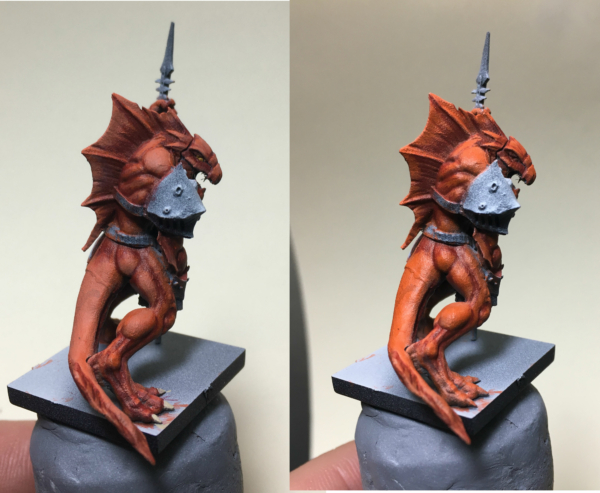
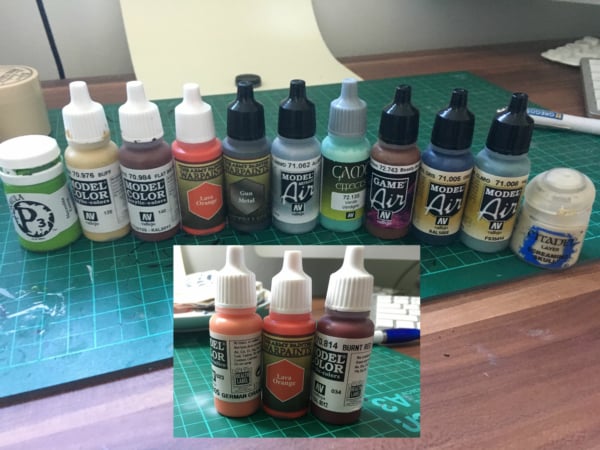
The main colour for the skin tone I used was Army Painter Lava Orange. I used Vallejo Burnt Red to glaze the shadows and for the highlights I added some Vallejo Buff to the base Lava Orange and glazed in those parts. In all there are roughly 7-8 glazed layers to create the skin tone effect.
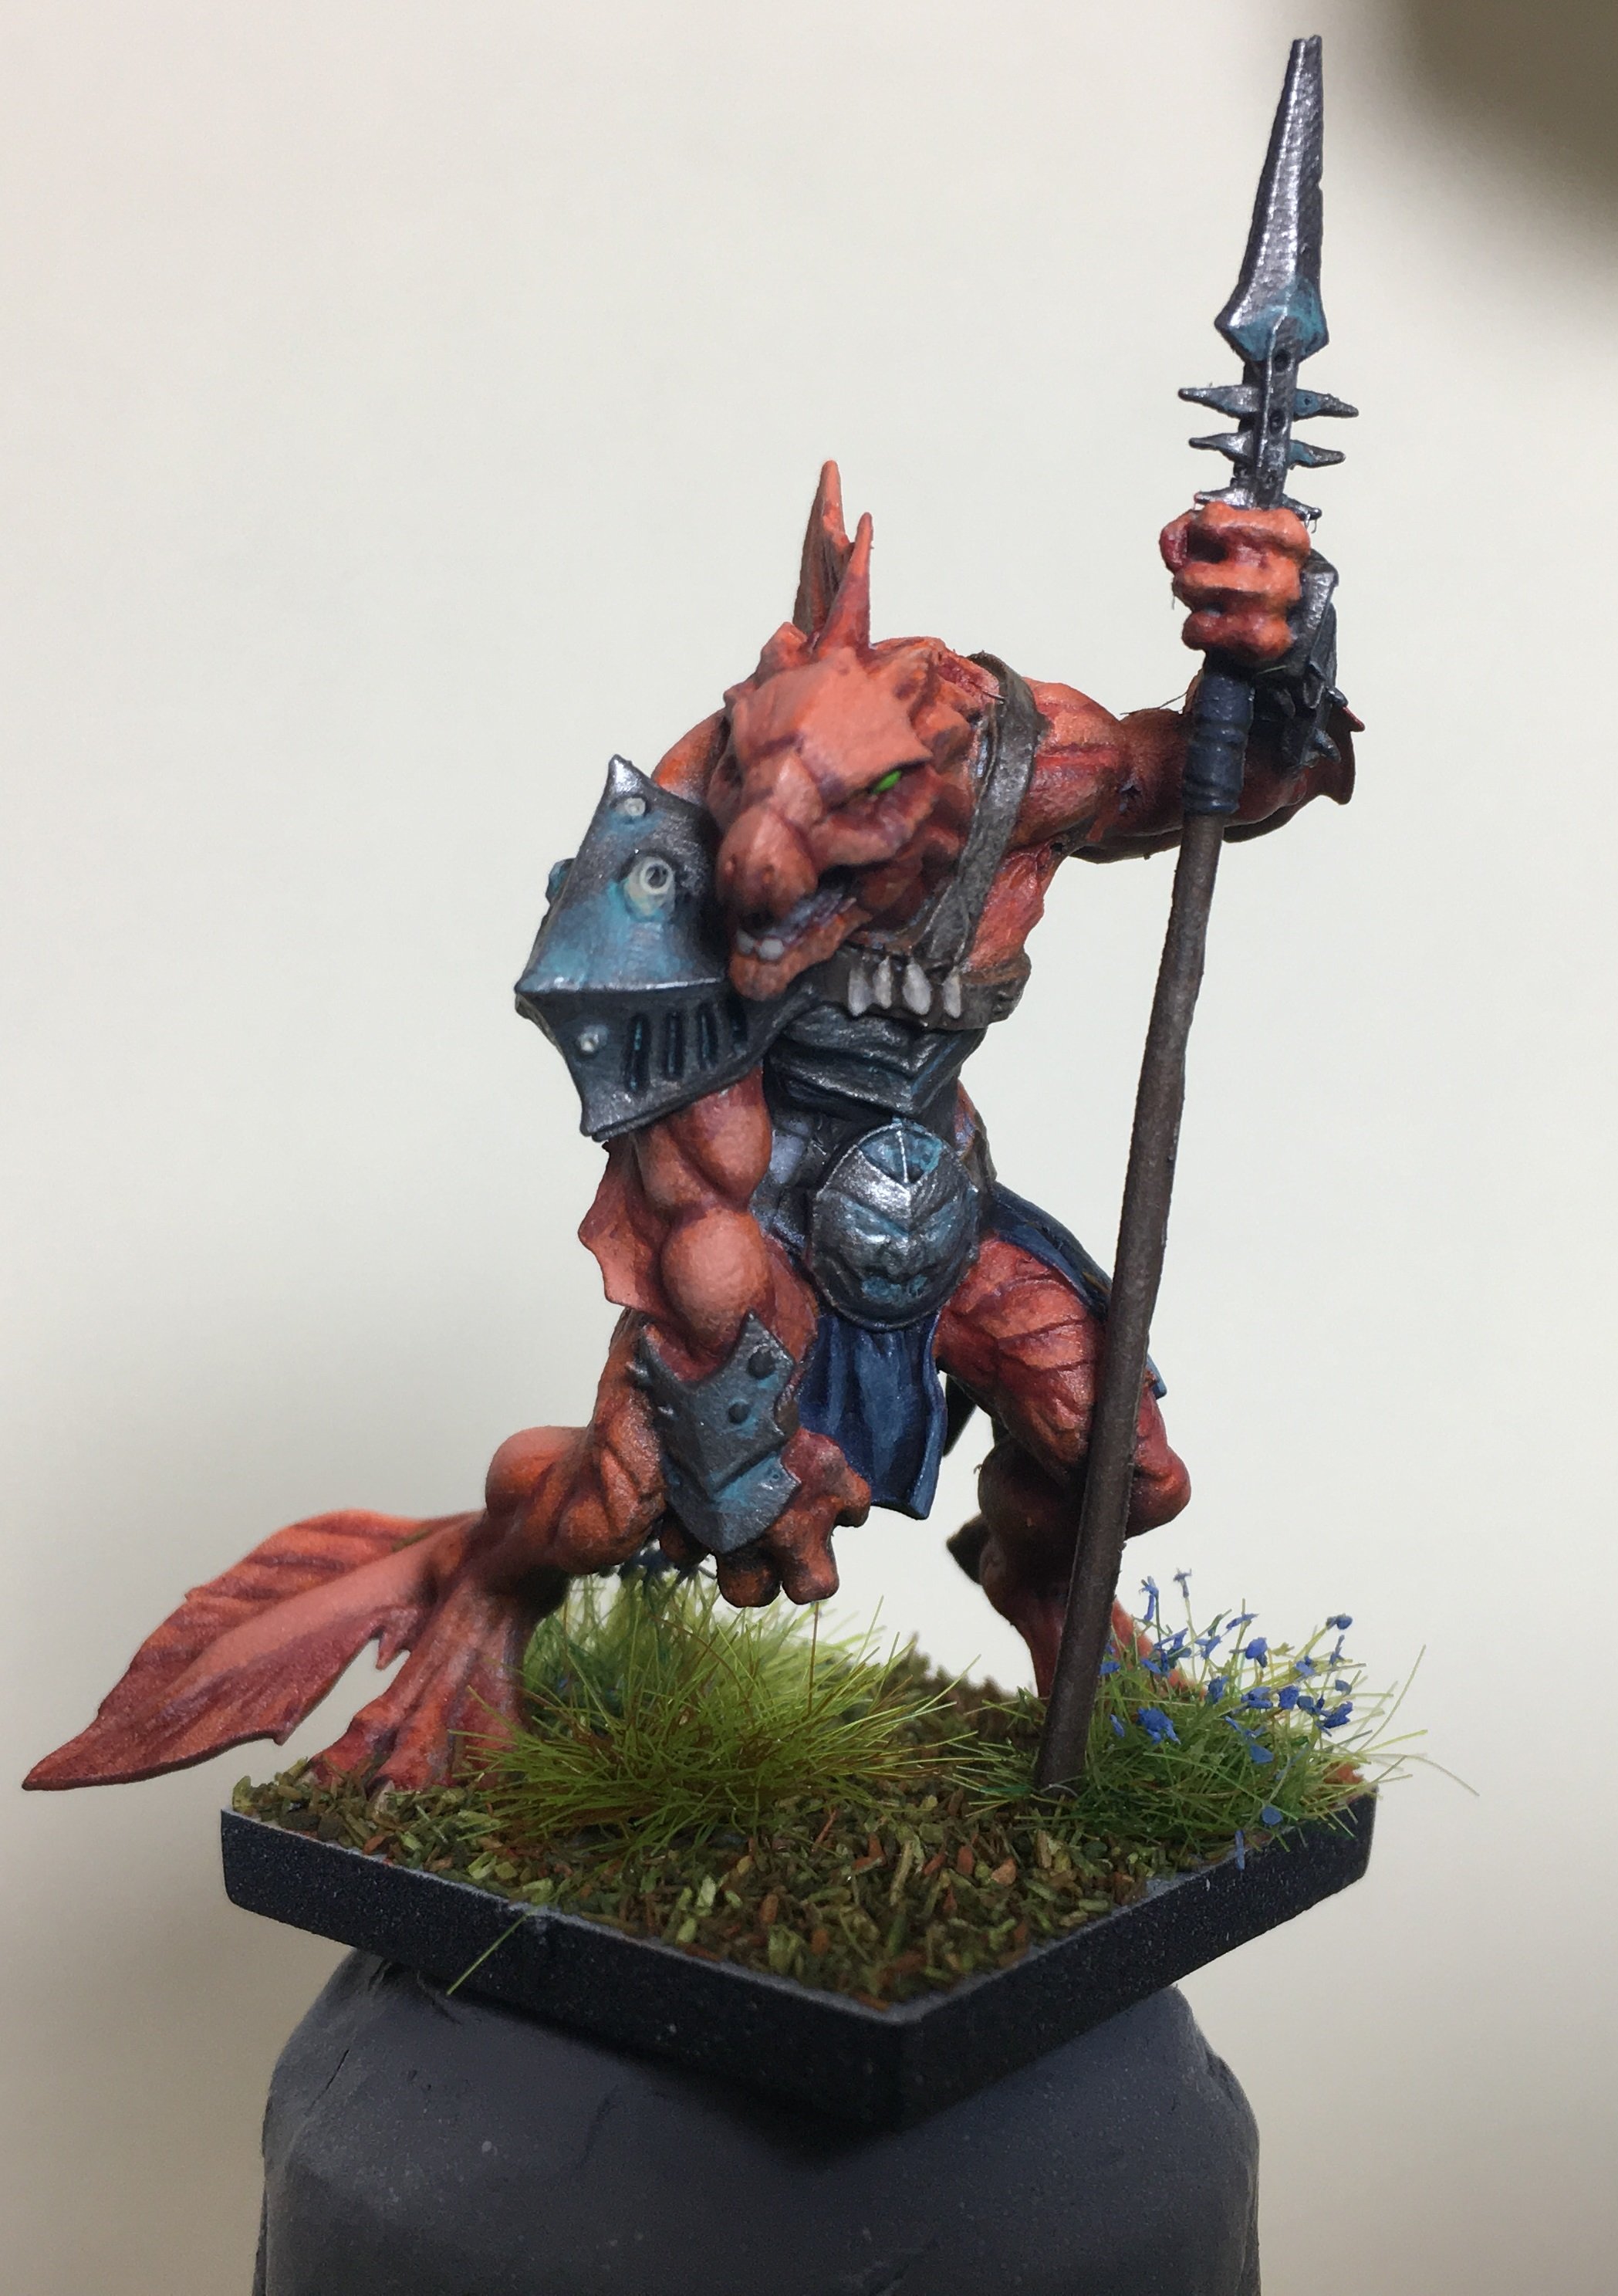
The armour was Army Painter gun metal, highlighted with Vallejo Model Air Aluminium.
The cloth and feathers were done with Vallejo Model Air Grey Blue and Pale Blue.
The leather straps were a base colour of Vallejo Flat Brown and stipple highlighted with Vallejo Model Air Barbarian Flesh.
Here is the final result
The paints below make up the list of colours used for the
Start to finish Eckter took around 4 hours to paint. I hope you like it.
Cheers
Martin