


How to play Kings of War on Tabletop Simulator
4th May 2020
Rob Burman
Hi everyone! With the lockdown continuing, we realise more and more of you are turning online for your gaming fix. After a comprehensive guide to play Kings of War on Universal Battles (which you can read here), today we're handing over to community member Karl Booth to talk about how to play KoW on Tabletop Simulator. We don't understand a word of it, so best to let him take over...
I picked up Tabletop Simulator (generally known as TTS) in order to play the miniatures game Infinity during lockdown. After a couple of games it quickly became apparent that this program is awesome and I got to wondering what else might be out there? Turns out there is a LOT, and it didn’t take too much tinkering to get Kings of War up and running.
After a frenzied few days (and at least one fairly sleepless night) of finding things, working out how the various tools function, deciding to create stuff from scratch in Blender, and some coding that Frankenstein himself would have been proud of it was time to get battling in glorious 3D:
WHAT IS TABLETOP SIMULATOR?
Fundamentally Tabletop Simulator is a sandbox program designed to allow players to create more or less whatever they want and then connect with other players from all over the world to play games that have been created. While I’m just going to look at Kings of War it’s worth noting that there are also mods available, and communities for a whole host of games, including Mantic's Vanguard too!
All the mods are available in the workshop, all at no additional cost (TTS itself is a one-off cost of about $20US if you pay full retail).
The community for Kings of War is still in its early stages. At the time of writing we have 154 members in the Facebook group “Kings of War -Tabletop Simulator” (https://www.facebook.com/groups/804007473421876/), and about 20 in the Discord Server (https://discord.gg/rWR7u9s), which is pretty good given that the first rough draft only came out about three weeks ago!
Most people are in the process of creating their first couple of armies, getting a feel for things and playing their first few games. As usual with KoW it’s a great bunch of people, who are ready to jump into a game to help out other members of the community.
This guide is intended to get you going with TTS. There are additional tips and tricks and more detail on how to do some more complex stuff that can be found within the Facebook group and Discord server. I’d recommend joining one or both so you can get any extra help needed and organise games against people from all over the world.
There are a few parts to this article that will guide you through, downloading the game, assembling an army, and playing the game. There are a few pre-built demo armies, so you can skip the creating an army section if you want to use one of them. These will be added to over time, but it will be a few weeks before we get close to fleshing all the armies out with pre-built units.
WHERE TO START
Before you can go anywhere you will need to purchase Tabletop Simulator. Don’t worry though, after this initial outlay everything else talked about in this article is free forever. There is also a trial period available through Steam – if you play less than 10 hours and don’t like it you can easily return the game and get a full refund.
It’s difficult to judge what the system requirements are for TTS since it depends on how complicated the individual mod is. Playing 3D wizard chess isn’t as intensive as playing Kings of War with loads of detailed models.
So what’s this workshop I speak of, and how do you get started with Kings of War? The workshop is a hub for community created content for Steam games. After you have installed TTS just open up Steam, click on TTS, then on the workshop.
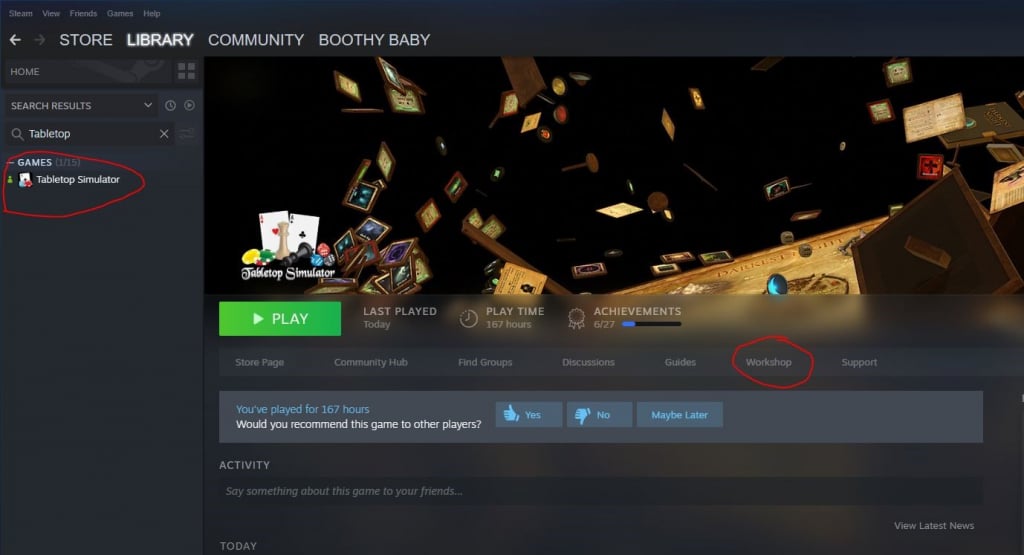
Now you need to search for the mods you want and subscribe to them by clicking on the green + button. Once you are subscribed you will be able to access the content in game.
Grey ticks mean you are already subscribed to something.
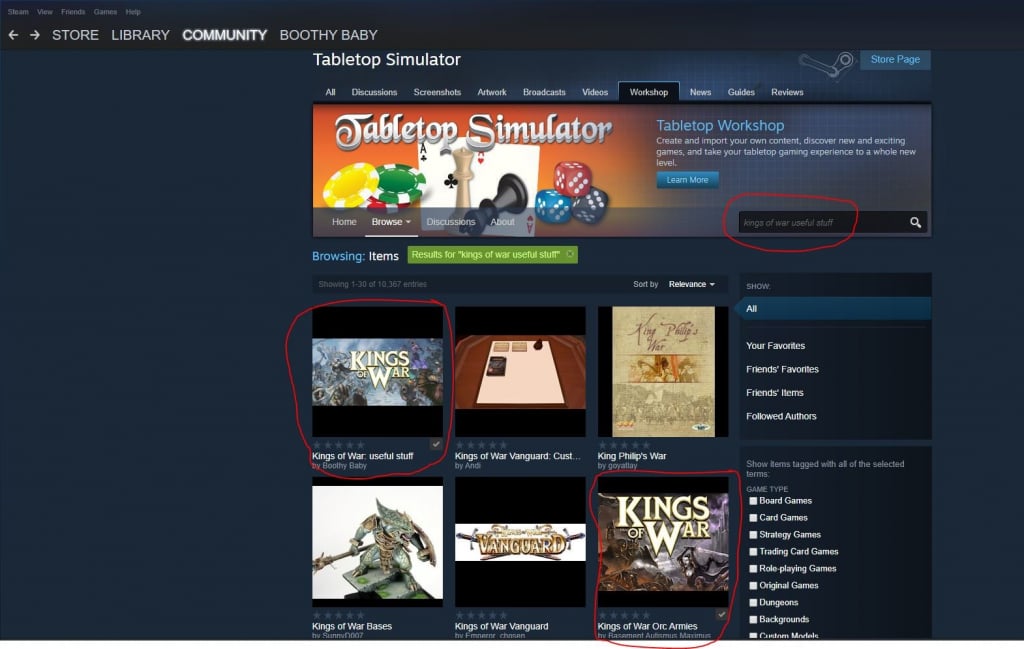
Kings of War on TTS is still rather new and made possible by several different mods providing gaming tools and models separately (unless you are using the demo armies, in which case you only need one mod).
At the very least you will need the “Kings of War: useful stuff” mod. Then, if you want to build an army from scratch you will need any other mods that contain the models you want to use e.g. “Kings of War Orc Armies”.
CREATING OR JOINING A GAME
To create a game simply open TTS, click the create game icon, then single player or multiplayer. Single player is good for creating an army.

Once you have selected single player or multiplayer you will be taken to the menu shown below to select the type of game you want to play.
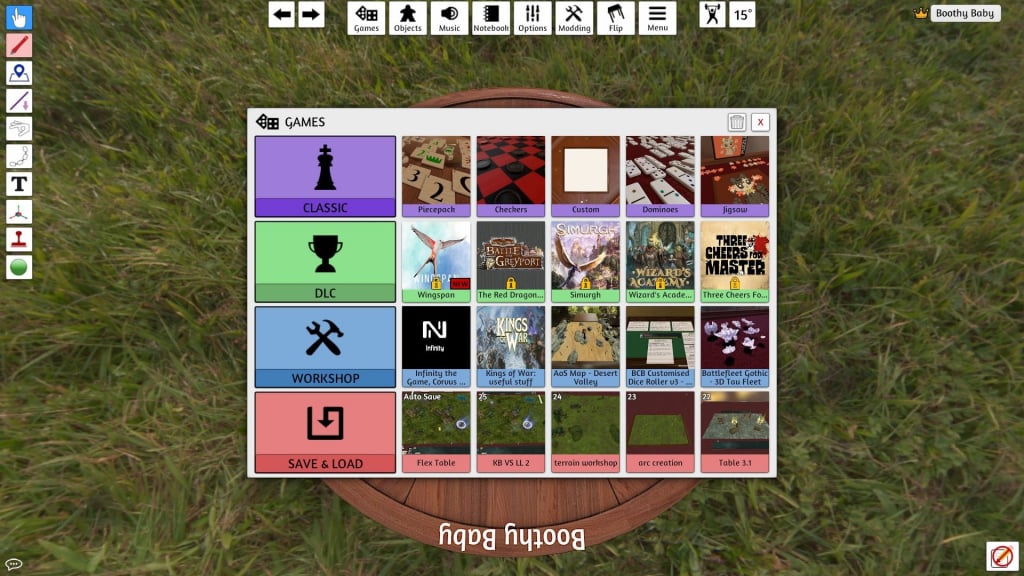
Subscribed mods are found in the “workshop” tab, saved games in the “save and load” tab etc. The “DLC” section has some fully constructed ready to go games that can be purchased.
If creating a multiplayer game, create a name for the server, select how many players are allowed in, add a password if you want one, and then click create. After this you can load up any mods or saved games you have and load items into them. Once a mod or saved game has been selected any players can bring their armies in as saved objects (more on that later).
Once a game has been created people can either search for it through TTS by selecting “join” on the main menu and then searching for the desired server name. Or the host can send invites out through Steam to any Steam contacts they have using the + button shown in the second picture below.
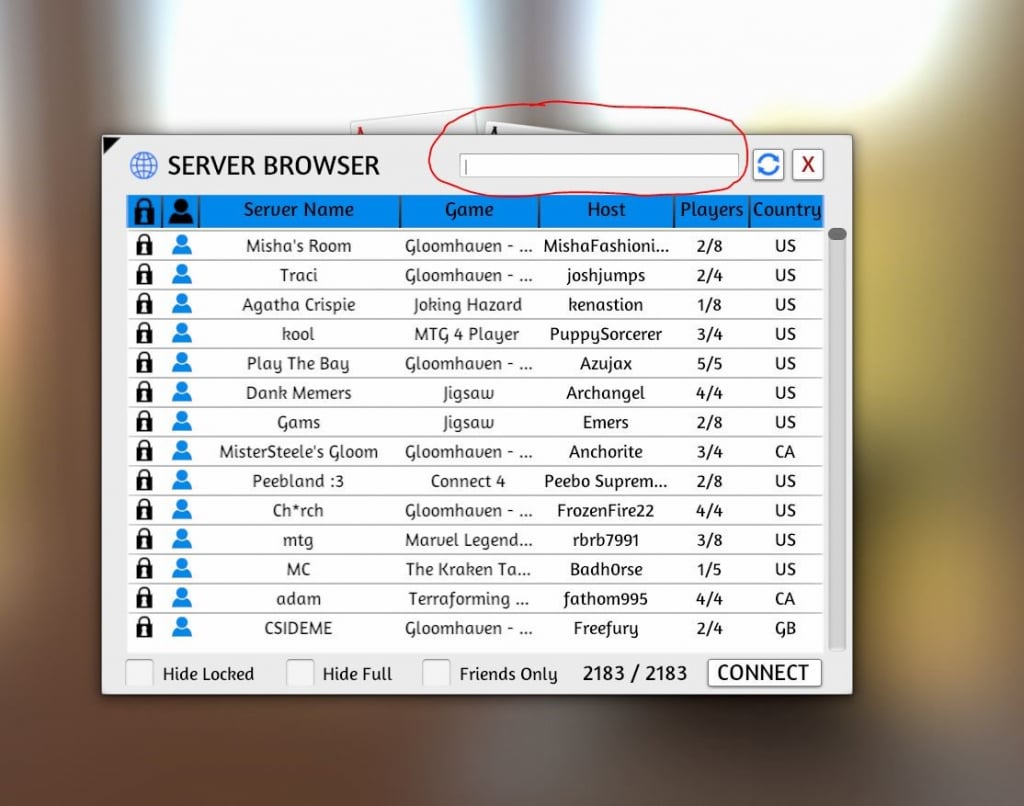
Search for the server name in the box at the top.
The indicated + allows the host to invite Steam contacts directly into the game.
Now that we are in a game I should run through the basic controls. They are quite similar to the Total War games:
- W/A/S/D – move around the table
- Left mouse button – pick things up, drag to select
- Right mouse button – change the camera angle, access an objects menu
- Mouse wheel – zoom in and out
- Tab – hold to measure things as you move the mouse
- Q/E – rotate a held or moused over object
There are more controls that we will touch on later, but these will enable you to move around and interact with things.
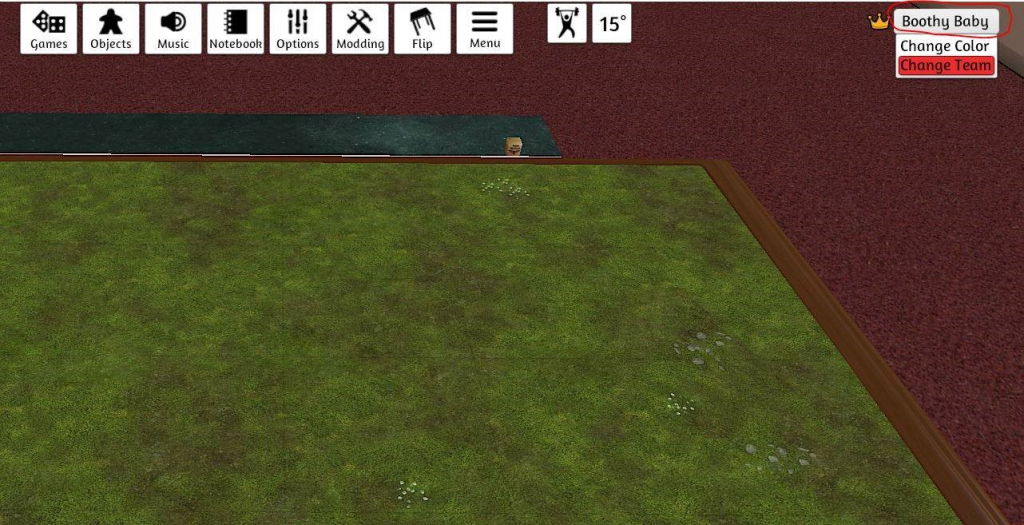
Once someone joins a server the host will need to “promote” them so that they can interact with stuff. This way you can have spectators, but they won’t be able to accidentally move things. Both players also need to choose a colour. All these buttons are found by clicking on a players name in the top right of the screen.
CREATING AN ARMY
Since we used the Kings of War Orc Armies example above let’s build a unit from the models in that mod.
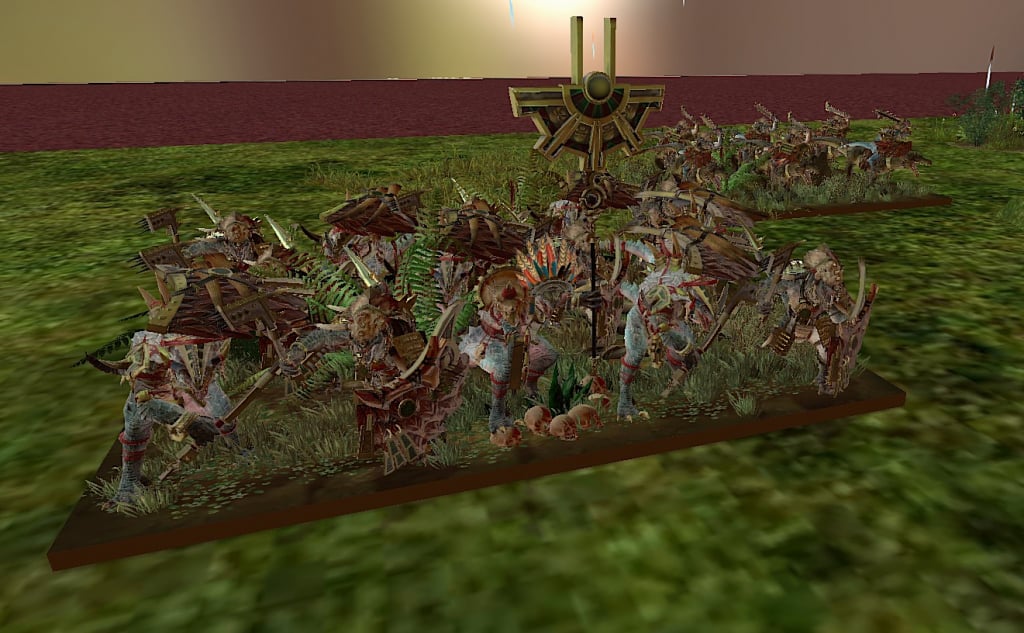
In this mod it looks like the army is ready to go, unfortunately it's not. These older style units made from many individually based models are horribly unstable and can cause the entire table to explode (literally, I’m not kidding, it’s quite spectacular!) Thankfully, TTS got a major update in April 2020 giving us the tools to create completely stable regiments. Having said that, these models still look great and we want to build an army from them so let’s look at how to do that.
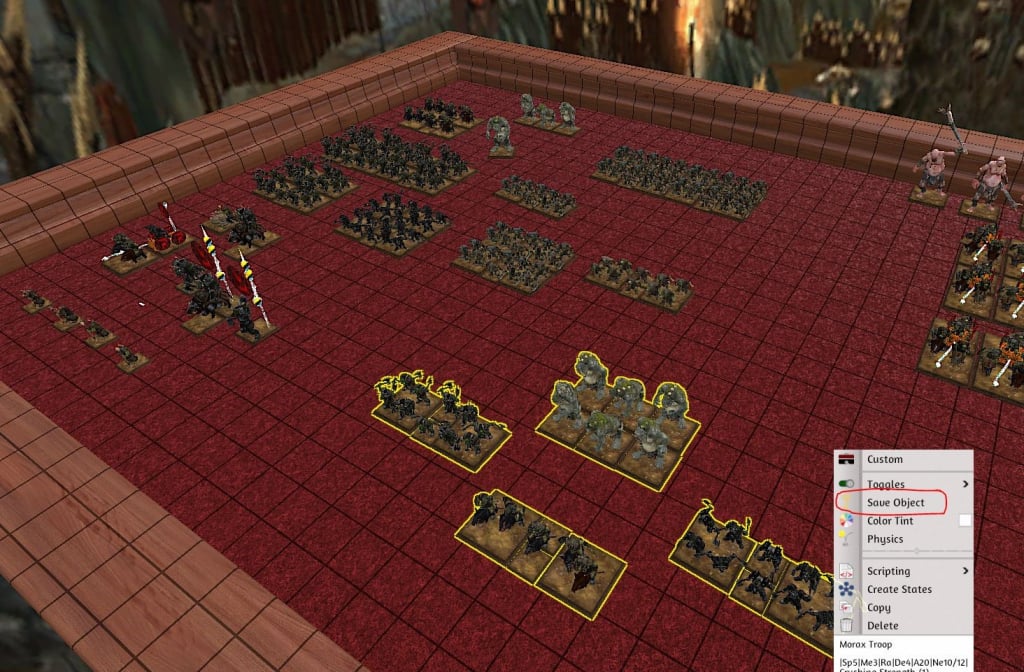
Simply pull all the units you might want to one side, select them all by left clicking and dragging a box to highlight them all. Then right click -> save object. Give them a name, and then we are done with this mod.
Next load the “Kings of War: useful stuff” mod. This contains all the tools you will need to base your army, decorate it, and get to gaming.
Now we want to start editing things. This is best done when the physics is partially turned off. To do this go to the “options” menu at the top, then select “server”, then change the physics to “semi-lock”.
On to customizing and creating units. Go up to the objects menu -> saved object -> drag the object you created previously into the table. All the models will then appear in this mod. Depending on how quick your internet connection is it may take a few seconds for them to load.
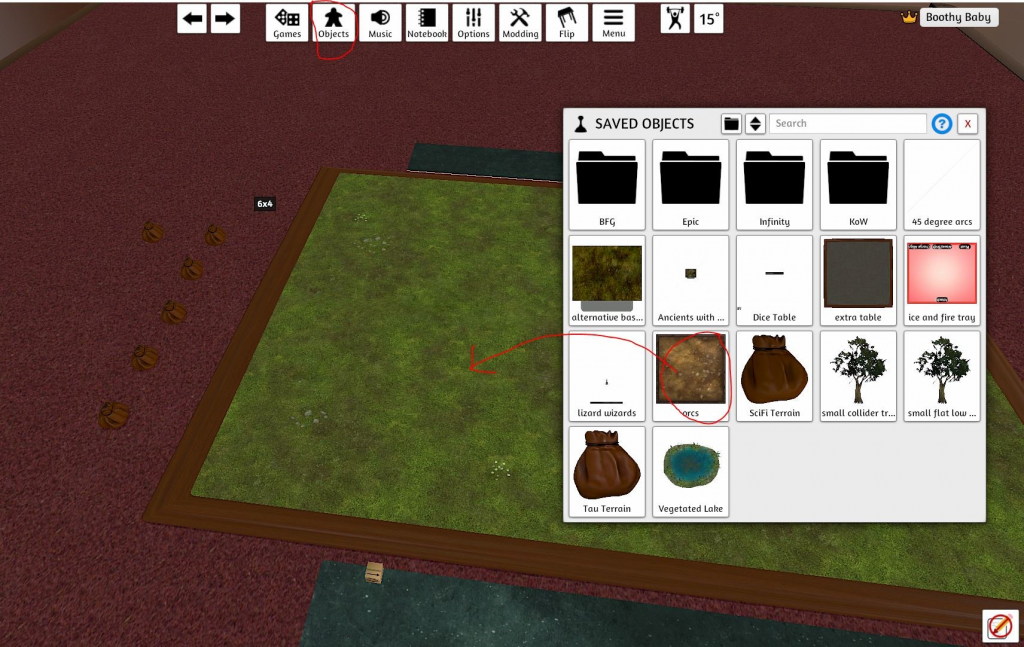
On the left you will see a load of bags. Each one contains stuff to help you play. There is a bag of all the different movement trays that contain a code to control movement and display arcs, there are bags for terrain, different tables, magical effects, weather, tokens etc.
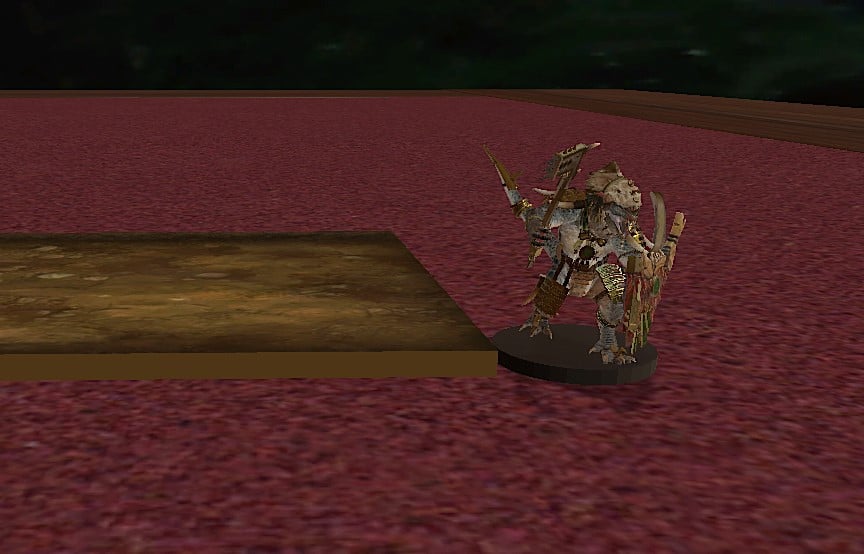
For now, right click on the movement tray bag and pull the desired unit tray out. Next we delete all the bases from the models we want and copy paste the models over to the unit tray.
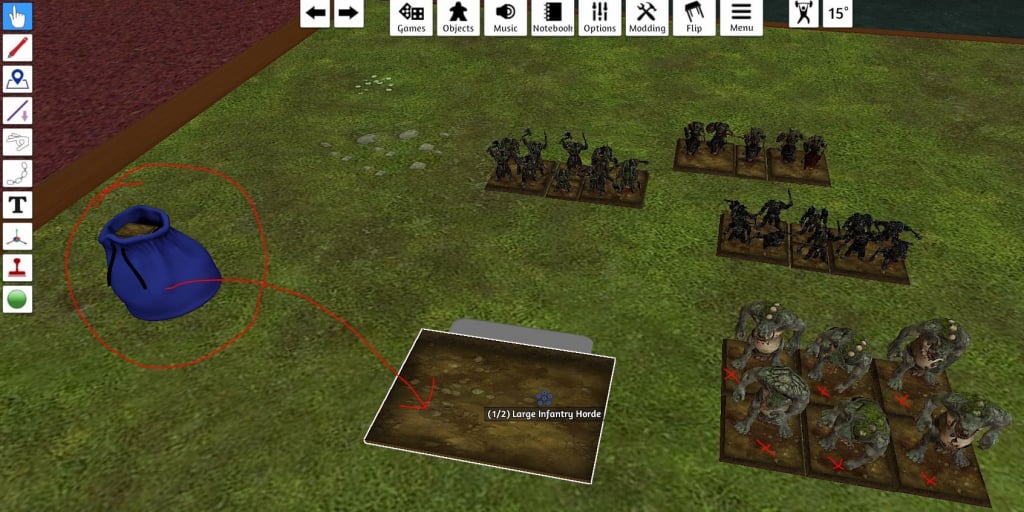
At the moment we just have a load of separate models on a tray. If you pick it up everything’s going to fall over. To turn this into a single stable element we need to use the “attach” tool. This is located on the menu below or by pressing F6 once (1x F6).
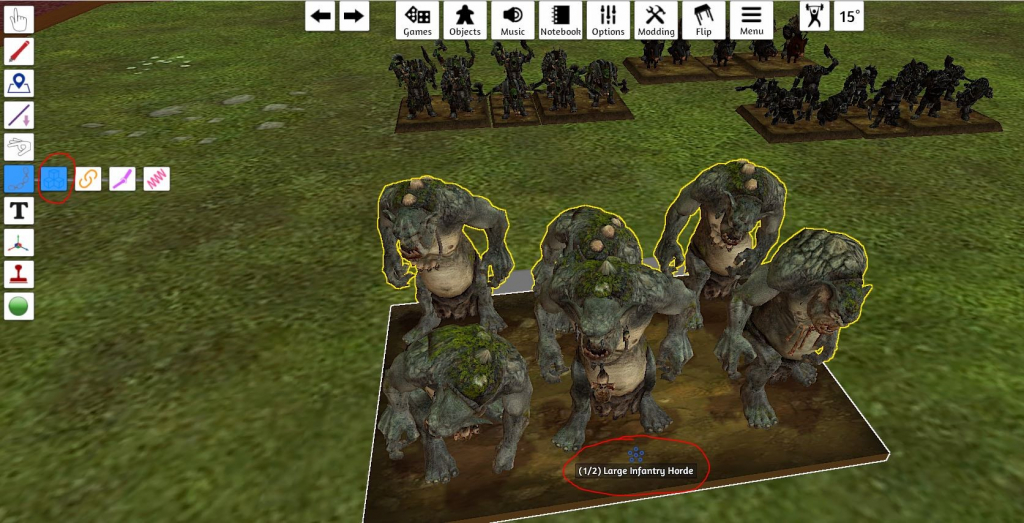
First select all the models and the tray, then click on the attach tool, now click on the movement tray. Its very important to attach the models to the tray and not the tray to the models! If you get it the wrong way round all the gameplay functionality that is built into the trays will disappear and the pivot point of the unit will be all wrong. Note that when you hover over items it will display their name, so make sure the attach tool is showing the name of the tray before you click (see above).
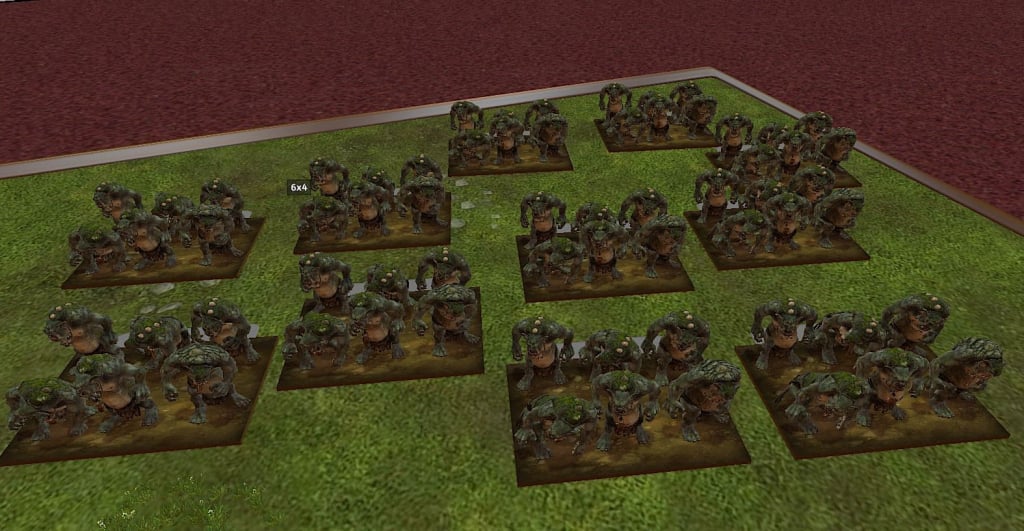
The unit is now a single element. You can now copy and paste the unit to get as many of them as you want.
*Insert evil laughter here*
Repeat this process for all your other units then save the army as an object so it can be deployed straight onto the table in the future.
If you want to get really creative with units then the gizmo move function (1x F8) allows you to push objects through each other. This allows you to add ornamentation to a unit’s base at a later date, or attach gouts of flame to a dragon, magical spells to wizards etc.
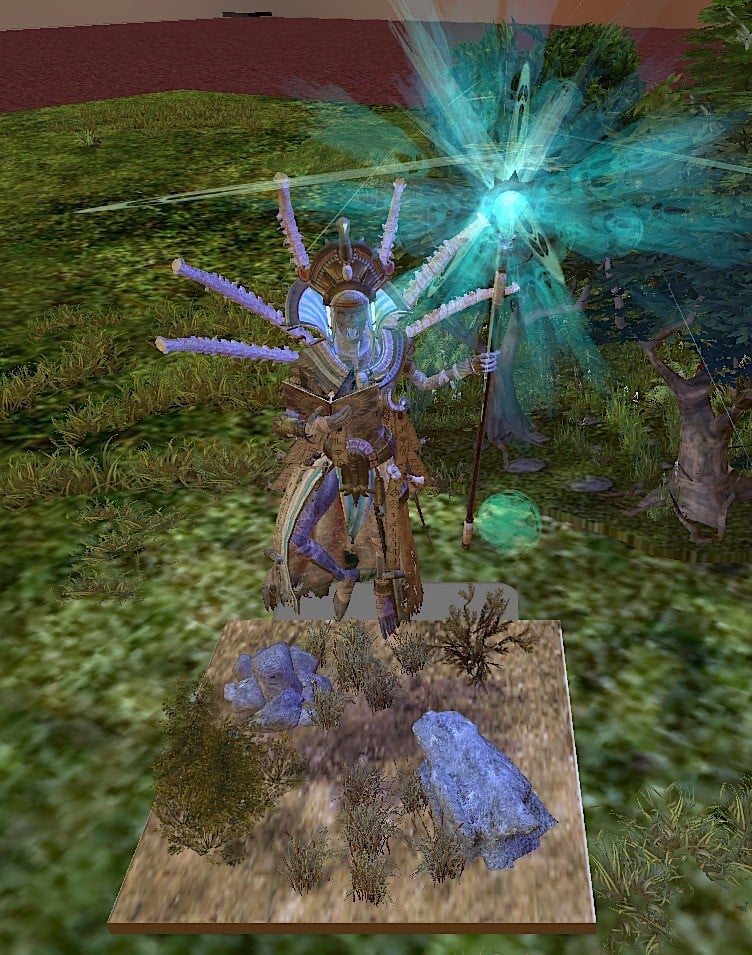
Here I have used the gizmo to levitate the ‘orb of souls’ and a light source up and stuck them inside this mighty necromancer’s staff. Once they are all attached with the attach tool they will stick to him forever.
In this example I placed all the lizards on the base and then added loads of vegetation to it by moving the scenery items through the already placed lizards.
The gizmo move tool is particularly good for some of the models that come fixed to their bases. For these you could just drop them onto the top of the movement tray as normal, or you can use the gizmo tool to sink the base of the model into the movement tray so it can’t be seen (just be sure the tray is thicker than the base – you can thicken the base using the gizmo tool if needed).
Lizard on ugly black base.
I dropped the base on top of the movement tray and then sank it through until the base just disappeared below the top of the tray. This leaves the lizard appearing to stand on the movement tray. Much better!
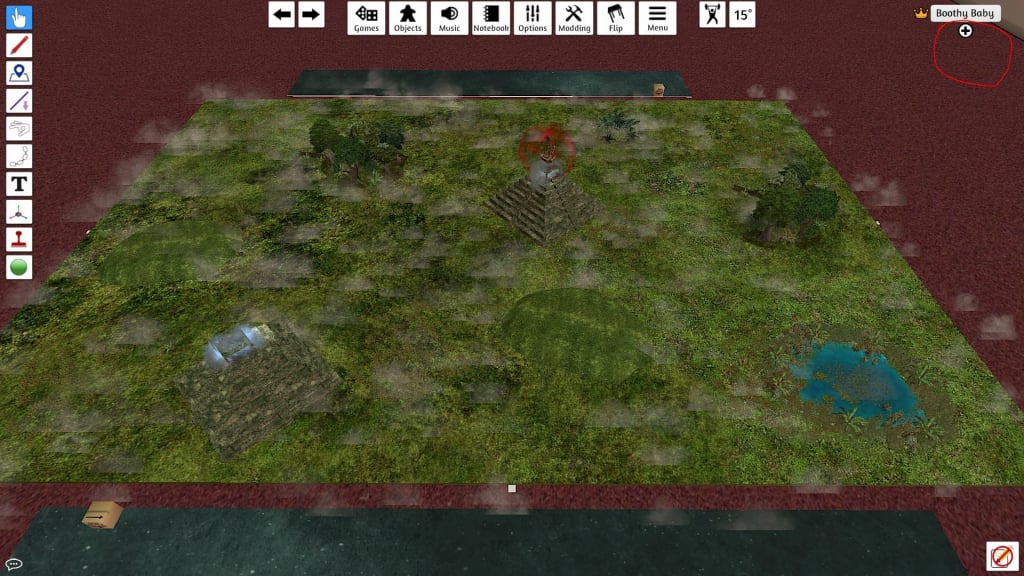
Setting up the table
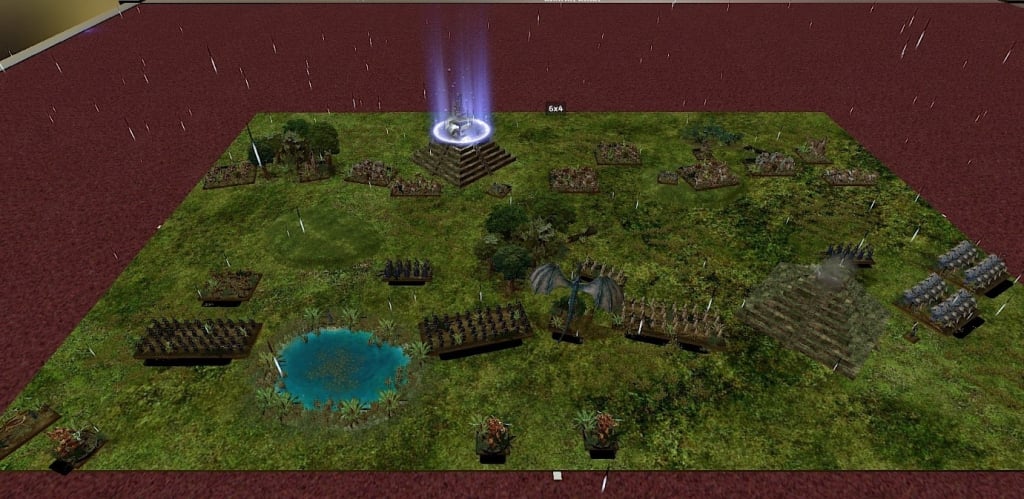
There is a map loading tool that will allow you to almost instantly load a selection of pre-made tables. There are a few map bags found on the left-hand side of the “Kings of War: useful stuff” mod which can be identified by their “SET_” prefix. Just drag these onto the green arrow of the map loading tool and a ready to go table will appear. These map bags can be saved as zip files and distributed amongst the community via Discord, email, Dropbox, in game saves, whatever. As such, anyone can contribute to the community pool of maps. I can’t wait to see what people come up with!
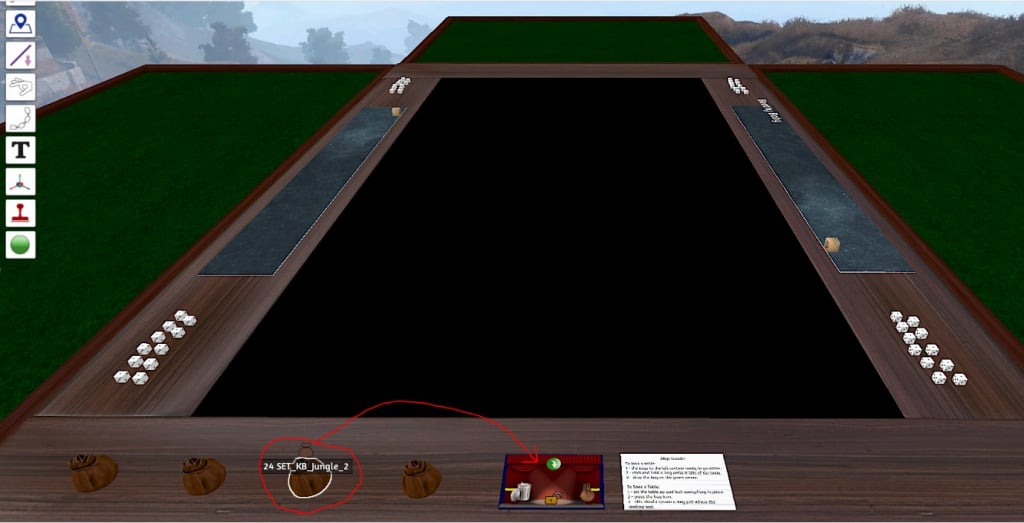
Click and hold on the map bag, then drag it onto the green arrow.
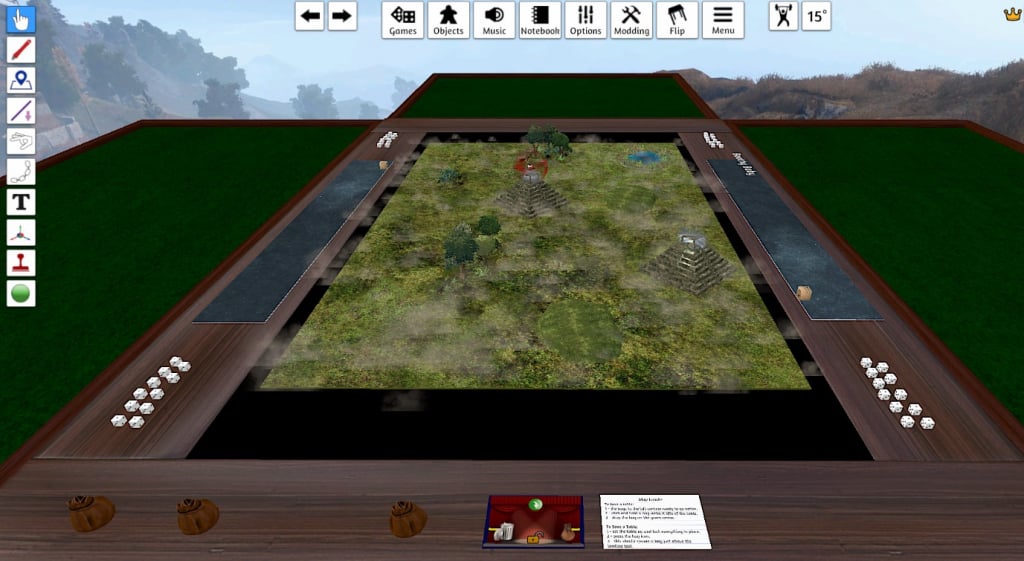
Ta Da! The table is ready to go.
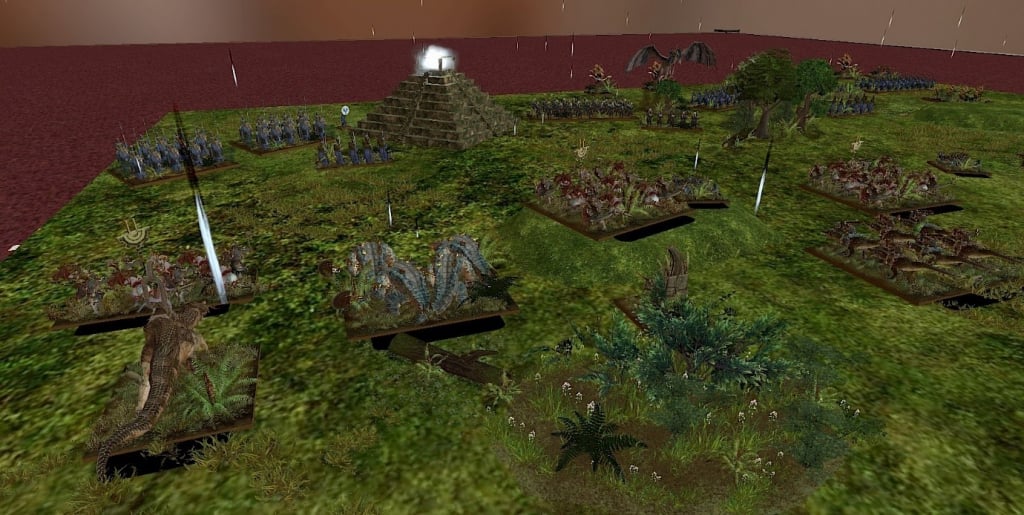
If you want to create a table from scratch, then the “Kings of War: useful stuff” mod has several different table styles and various types of terrain saved in the “Terrain” bag. You can also pillage other mods for additional terrain, but most of the terrain in the useful stuff mod has been edited to be more ‘ranks and flanks’ friendly than most (units wont bump into trees or walls for example).
As with everything else you can use the gizmo tool to move terrain about in strange ways to sink things into the table, or suspend stuff in the air (Pandoran floating mountains anyone?)
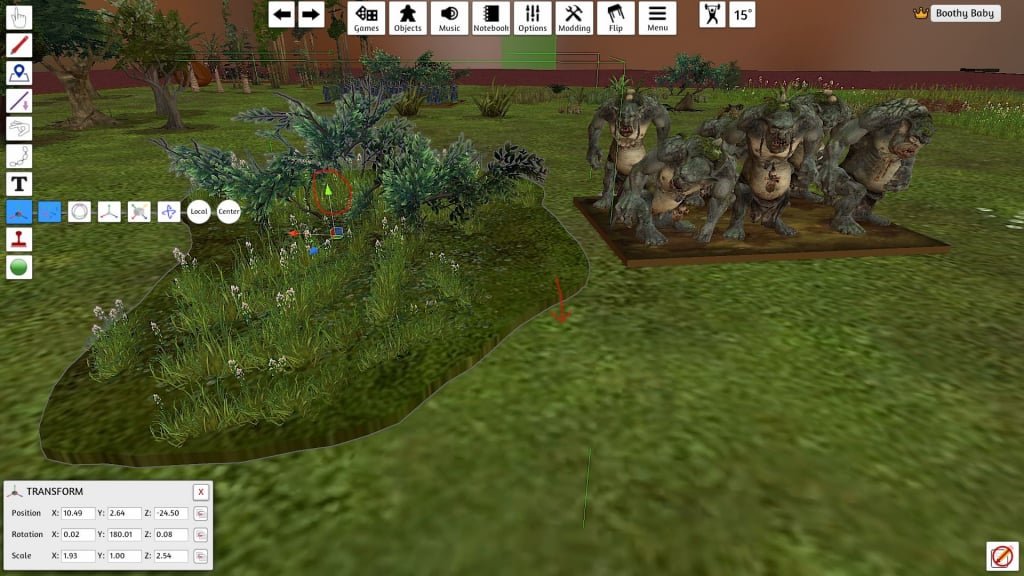
In this example the shrubbery base is a couple of mm thick so units will interact with it a little bit. Here I’m using the gizmo move tool to push it down into the table. Each of the gizmo arrows moves an object in a straight line along one axis.
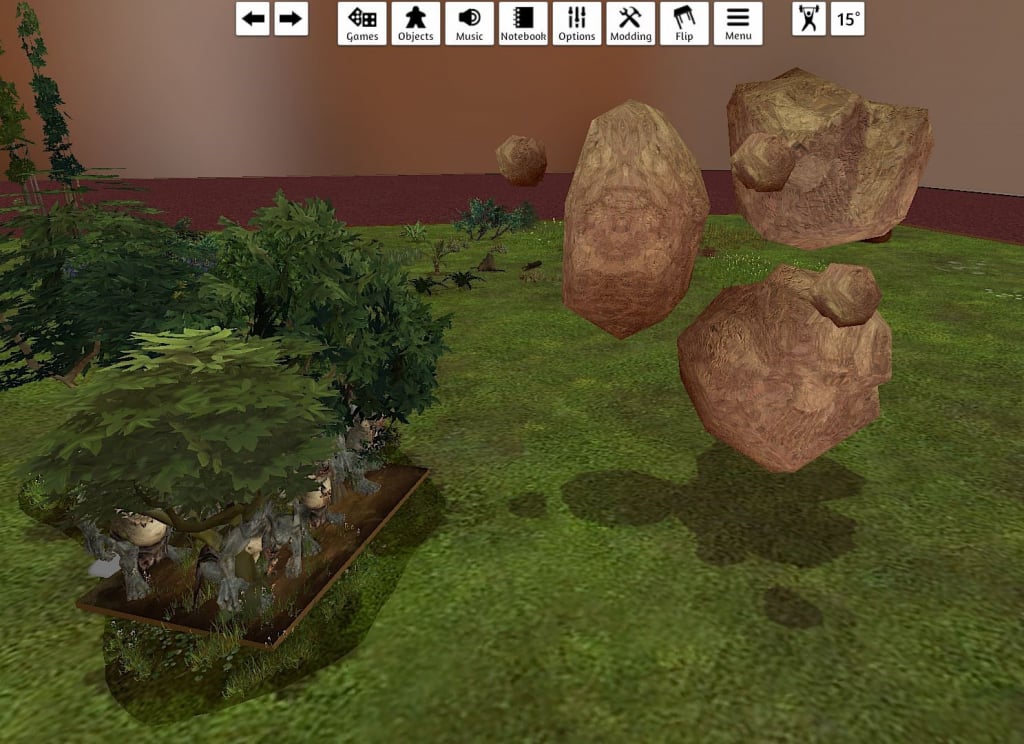
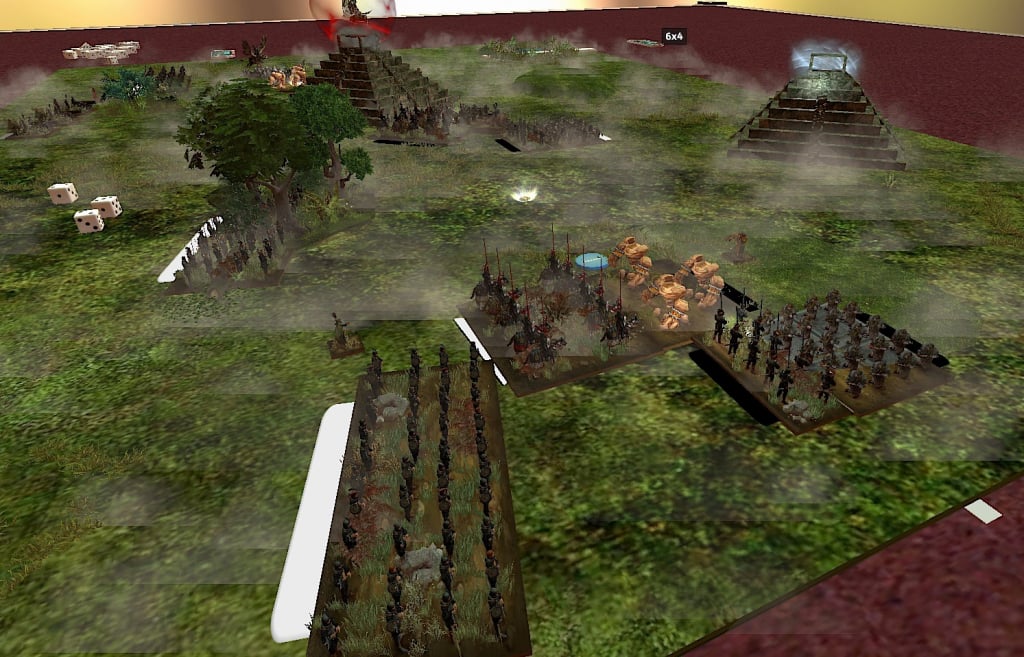
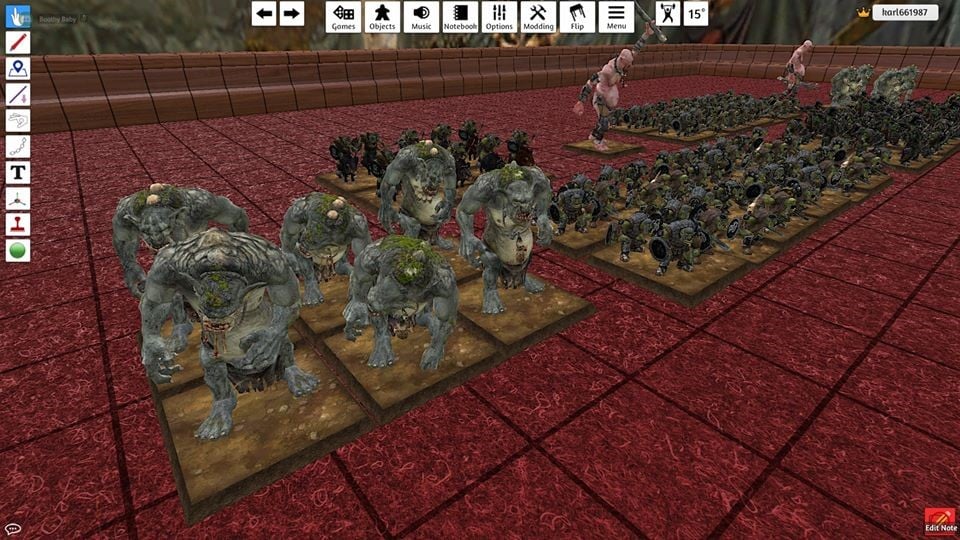
A very confused troll horde in the forest. You can see the trees projecting through their movement tray but not disrupting the unit’s placement at all. Also, the starts of those floating mountains... I think they need more mist, vegetation, and maybe a waterfall or two?
Once everything is in place you can “lock” them by mousing over the object and pressing the L key. This stops objects being accidentally moved or deleted. An object that’s been suspended in the air with the gizmo but not locked will fall back down to the table if it gets clicked on.
Gameplay
Now that it's time for gaming there are two things to do. First we need to change the “lift height” to 0. This means that units will only be lifted about 0.5mm off the ground (if that) when picked up. It makes accurate placement of units much easier, and gives the feel of sliding units around the table surface rather than picking them up and dropping them down.
Second (just in case you skipped the creating an army section) is to edit the physics. Go to the “options” menu at the top, then select “server”, then change the physics to “semi-lock”.
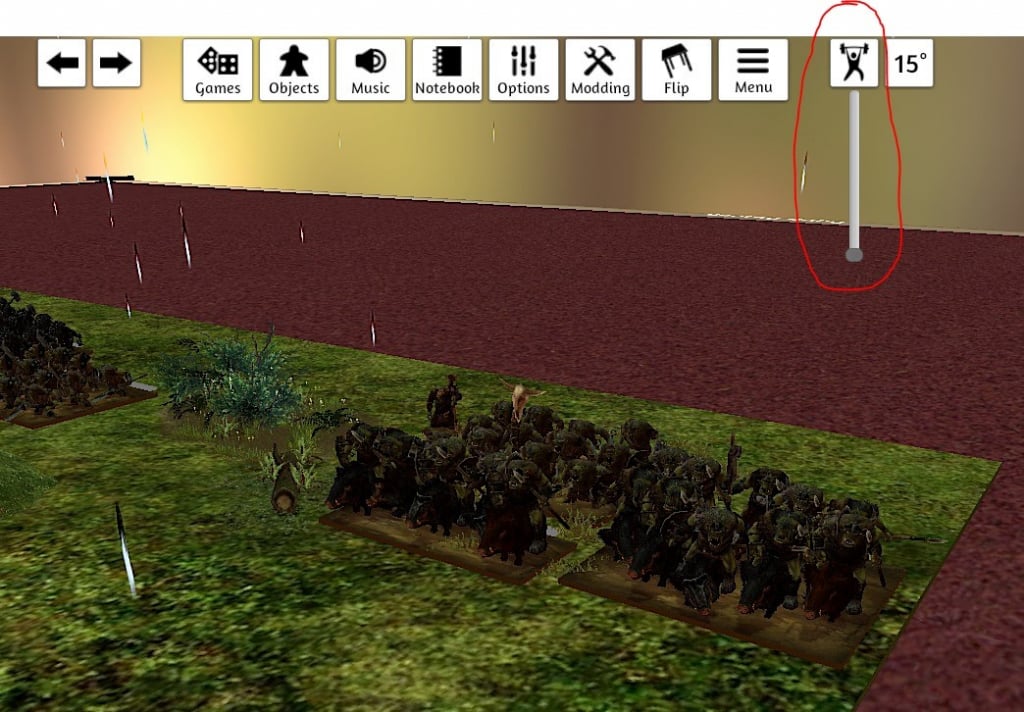
Not to discourage anyone from working out, but you need to decrease your lift height!
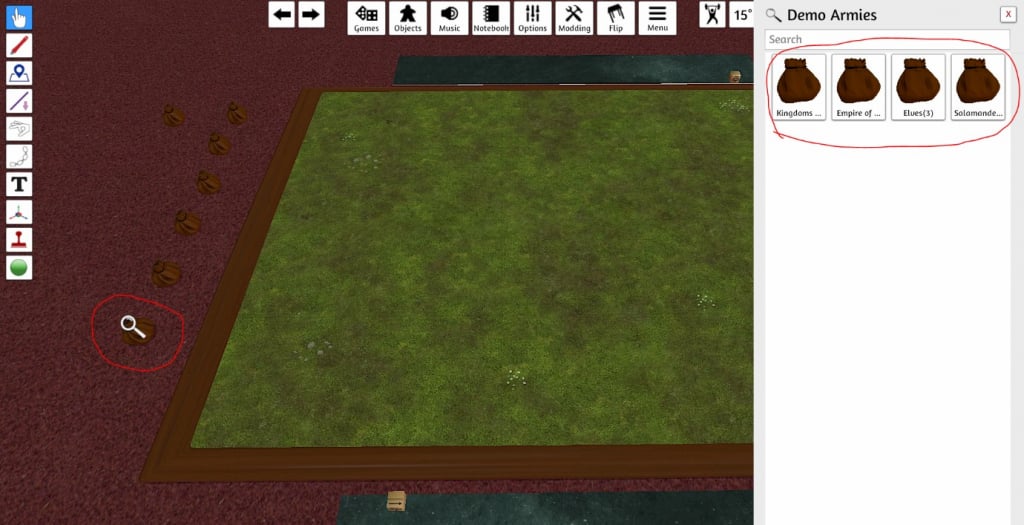
Accessing a Demo Army:
If you don’t want to build your own army there are a limited selection of units for a few armies within the “Kings of War: useful stuff” mod. Just search in the “Demo Armies” bag on the left, pull the army specific bag out, and then pull the desired units out of that. You can save these as an object to be used whenever you want. This is will allow you to bypass the construction of an army so you can get going straight away. The number of units and armies will increase over time, but its still early days so the selection is rather limited.
Moving and Measuring:
All the units have a button at the back of their tray that switches them between the different movement modes. When you mouse over the button a little red circle appears indicating that a left click on the mouse will click the virtual button.
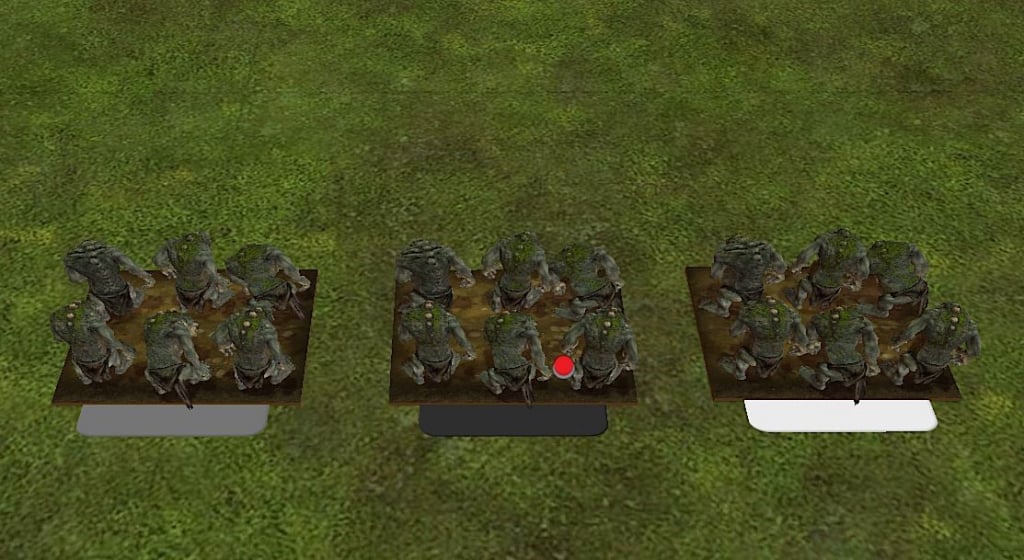
Grey Mode – this is the default mode. Units can be moved freely and rotated using the Q and E keys while it is picked up or moused over. Unfortunately, each press of the Q or E keys rotates the unit 15 degrees which can be too coarse for Kings of War. Thankfully, we have a solution to this in white mode. Once clicked grey mode goes away until the units state is changed.
Black mode – locks the unit into forward/back and side to side movement. This is designed to allow accurate normal moves for units so that we don’t get any accidental diagonal movement.
White mode – this is the rotation mode. It calls up a ‘slider’ at the top of the page that allows the units to be rotated 180 degrees in either direction without the 15 degree minimum rotation associated with the Q and E keys. Just click on the little blue dot and drag it to along the slider. The unit can be freely moved in this mode just like grey mode.
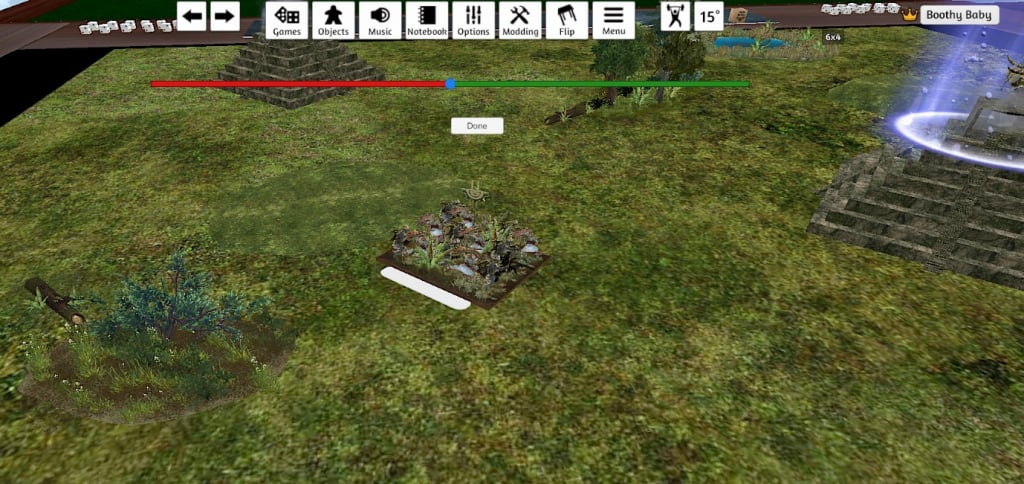
When the unit is rotated to your satisfaction clicking the “Done” button or switching modes will remove the slider and switch the unit to black mode.
States:
Each tray has two states. One is its normal appearance, and one has all its arcs marked out with lines. You can toggle between the states by mousing over the unit and pressing the number 1 or 2 keys.

Catapults in ‘arc state’. You can also see my opponent measuring their drakons' move on the left (green line).
Measuring:
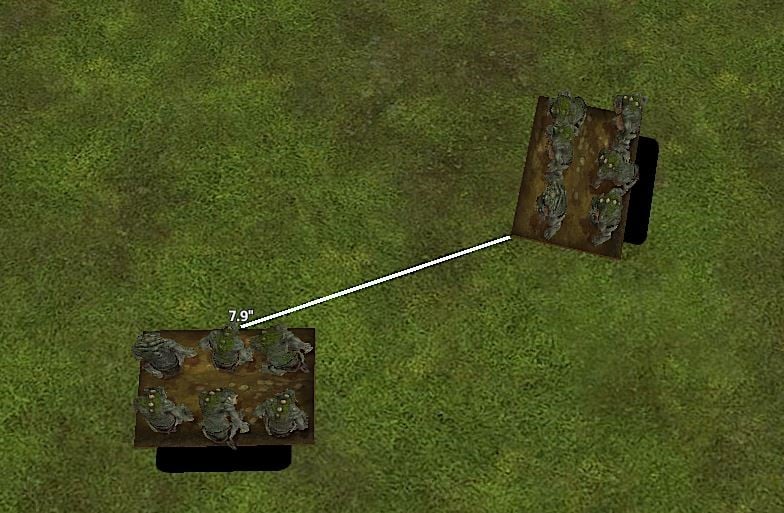
Pressing and holding the tab key starts measuring from the tip of your in-game hand's index finger. You can also do this while holding objects to measure exactly how far you are moving them. There is no messing about positioning rulers! Whenever a player measures something the line is visible to all players. This helps make communication very easy and is a great way to show what’s charging what.
Rolling dice
You have two options for rolling dice. Either spawn dice onto the table (they are in the “tools” bag). Then select the dice and then press the R key to roll them. Alternatively there is the dice table.
The dice table automatically counts how many dice are placed on it. Once you have the right number select them all and drop them in the little brown box, they are then rolled and sorted. Just delete the fails and drop the successes back in the box to roll again. Each time dice are rolled or deleted from the table the total will update so you don’t even need to count the dice. It's not quite as good as the dice roller on Universal Battle, but it's still way better than real life!
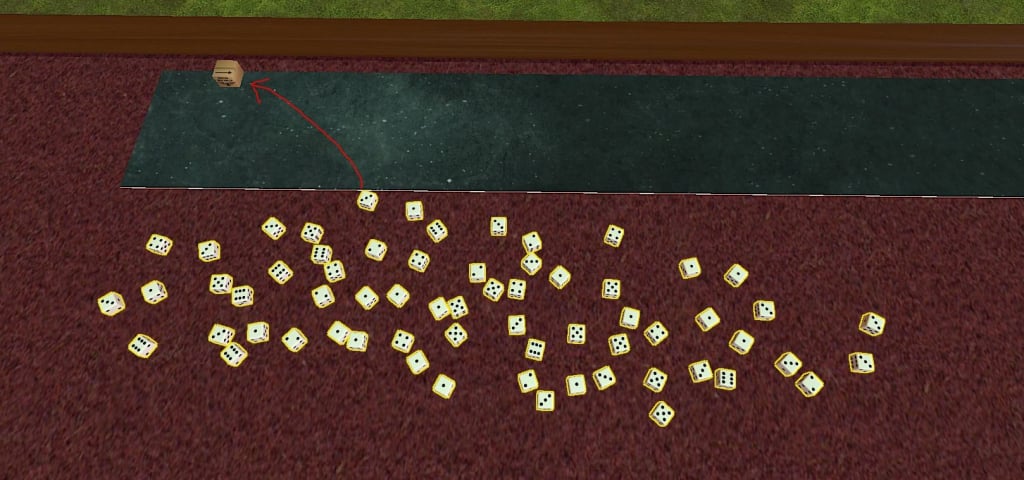
Step 1 - Select dice and drag them into the box.
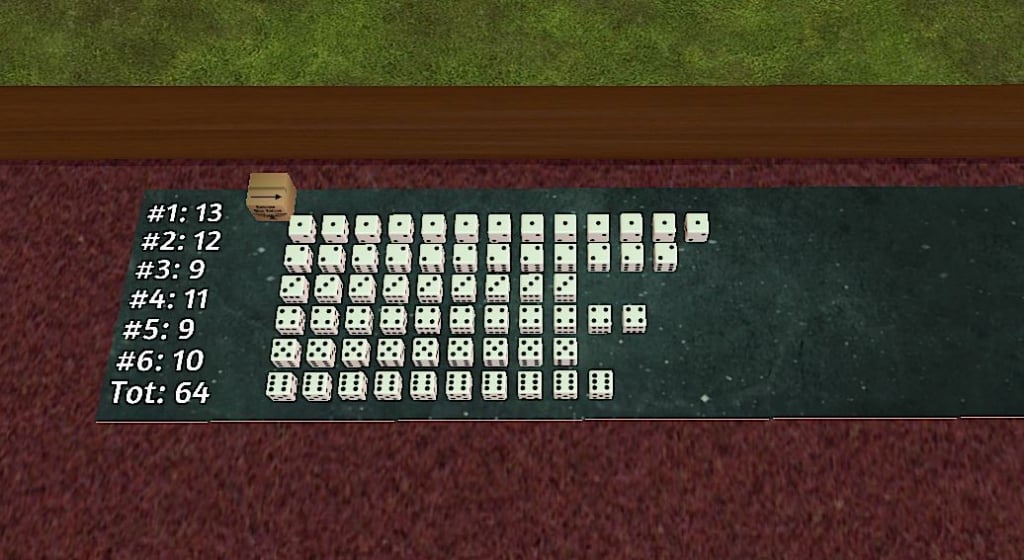
Step 2 - Enjoy not having to count dice.
Counters, indication, and general tools:
A great feature of TTS is that you can see your opponents' hand move about the table. This way you can just wave at things and say “this one” rather than having to describe the “7th zombie horde from the left”, or drag indication tools around the table. It’s all very fluid.
If you do need to mark something (or possibly construct a complex military attack plan) you can use the drawing tool (F2) to doodle on the table. These doodles can be deleted one at a time or all at once in the same menu.
By right clicking on a unit you can write notes in its description. I normally include what the unit is, any magic items, and how much damage it’s taken. This info pops up instantly when the unit is moused over by either player. No need to drag cards or tokens about the table if you don’t want to.
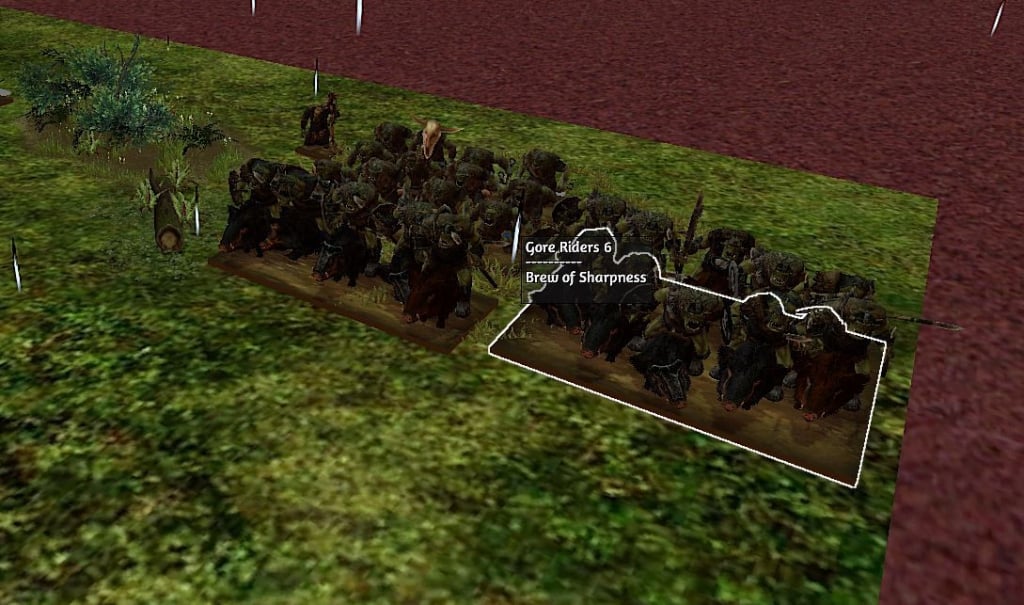
Alternatively there are numbered tokens and digital counters available in the “tools” bag these can be temporarily attached to units using the “fixed joint tool”. This way the unit will carry all its markers and tokens with it whenever moved, but the markers or tokens can still be deleted independently from the unit.

The highlighted Gore Riders have a digital counter attached to them to track damage. They can be moved together but modified or deleted independently.
The future:
As I mentioned before, at the time of writing Kings of War has only been accurately playable on TTS for about two weeks, so there is still a bit to do in order to get it perfect.
Some of these projects include:
- Working out how to get rid of grey mode (it's something of an inelegant work around to a scripting interaction).
- Creating ‘ready to play’ units for all the armies. Currently there are only a few sample units for a few armies inside the “Kings of War: useful stuff” mod. Opening TTS for the first time and having to create the desired units potentially from several mods can be a bit daunting.
- Bring some Mantic models into the game – having spoken to Mantic we may be able to get some basic 3D sculpts of their models. These would then need to be textured via UV mapping or photogrammetry. I haven’t got a clue how to do either.
That’s it from me. You should now have all the info you need to create an army and commence battling. If you run into any trouble feel free to send me a message on the Facebook group or Discord. At the moment I’m easy to get hold of, but outside of lockdown I regularly disappear into the wilds for a few weeks at a time so can be rather difficult to contact.
Hope to see you on the field.
Enjoy!