Kings of War – How to Play Series – The Melee Phase (and other shady stuff)
14th Oct 2022
Martin Thirlwell
The Melee Phase is where all your careful planning, positioning, and strategy comes together. Warriors are locked into combat in a brutal fight for their lives. In this phase, players get the chance to impose their will on the enemy and really reshape the battle.
Punching and Stabbing 101
Melee works similar to the Ranged Phase in that you roll to hit and roll to damage. Combatants will typically have much higher attack numbers and greater chance of Routing their opponent in this phase than compared to Ranged Attacks. If you’ve gotten a flank or rear charge, your chances of being successful skyrocket, so plan your charges carefully!
Combats are fought one engagement at a time. One or more Friendly units Engaged with an enemy unit will resolve all of their attacks and test Nerve before moving onto the next engagement.
- Roll a number of attacks equal to the Attacks stat, doubling in the flank and tripling in the rear arcs of the enemy. Any dice that meet or exceed the attacking unit’s Melee stat score a hit.
- Roll the number of successes again with each score meeting or exceeding the target’s Defence stat causing one point of damage.
- Repeat this process with every friendly unit engaged with the same enemy unit.
- Roll for Nerve. Add all damage caused plus the roll of 2D6 and compare it to the target’s Nerve stat. If the total meets the first number in the stat, they are Wavered. If the total meets the second number, they are Routed and removed from play.
- E.g. A Regiment of Basilean Paladin Knights smash into the front a regiment of Ratkin Warriors. They roll 16 dice to hit, 11 of which score a 3+ and are successful. The Paladin Knights have Thunderous Charge (2), modifying their damage roll by +2. Ratkin Warriors have a Defence of 4, meaning the Paladin Knights need 2+ to score damage (thanks to Thunderous Charge). The Basilean player rolls the 11 dice that scored a hit and gets 9 successes of 2+, dealing 9 total damage. The Basilean player rolls for Nerve and gets a 5,2 result, totalling 7. Adding the 9 damage to 7 Nerve = 16, beating the Ratkin Warriors Nerve of 14/16, Routing them and removing them from play.

Just like with Ranged Attacks, Melee also comes with modifiers. The most common is a Hindered Charge. If the Charging unit has traveled through or ended in Difficult Terrain or an Obstacle, their attacks will be resolved with a -1 to hit modifier. There are other modifiers that come into play from Special Rules. A particularly devastating example is Ensnare, which adds an additional -1 to hit when attacking in the front. If you want to play defensively, make sure you can take advantage of any and all negative modifiers your can impose on your attackers in the Melee Phase.
Feeling Nerve-ous?
Nerve is that critical element of Kings of War that combines damage and morale. As stated, it combines 2 numbers, a Wavering limit and a Routing limit, shown as X/X. Not every unit has a Wavering limit though! Some particularly fanatical or frenzied warriors are known as Fearless. These units cannot be Wavered and their Nerve will be represented by a ‘– ‘in place of the Wavering limit, such as -/17.
- If a Melee and subsequent Nerve test fails to reach either of these numbers, the unit will remain Steady and fight on as normal.
- If the result of the Nerve test reaches the Wavering limit, the unit is then Wavered. This represents warriors who are shaken but remain in play. In their next Movement Phase, they will only be able to be given a Halt, Change Facing, or Back Order.
- If the result of the Nerve test reaches the Routing limit, the warriors in the unit have been slain, chosen to run, or have otherwise been destroyed. The unit is removed from play.
To add an element of uncertainty to combat, there are two exceptional Nerve results. Rolling double 6’s on your Nerve test grants We Are Doomed! automatically wavering the target if the total is below the Routing limit. Fearless units ignore this. Rolling Double 1’s grants Hold Your Ground! granting a result of Steady, even if the total damage is above the Routing Limit. This can result in the target unit being Devastated, where their total damage is above their Routing limit. In this case, the unit halves their Attacks, Unit Strength, and Spell values.
Reforming from Combat
Depending on how your Melee Phase goes, you may find yourself in an unfavorable position. Charging units will have various options based on whether their target remains.
If you have successfully Routed your target, you may now regroup in one of the following ways:
- Stay on the spot and pivot around your center to face any direction. Check your angles as your opponent will be the next to move and Charge!
- Move directly forward D6 inches. You must travel the full distance rolled, stopping only for Blocking Terrain or other units.
- Move directly sideways either left or right, D3 inches, as above.
- Move directly backward D3 inches, as above.
Paying very close attention to where your unit will end up after a combat is critical to good play. Keep this in mind even before you make a Charge!
If you have failed to Rout your opponent, whether they are Steady or Wavered, you now remain Engaged. These units stay in base-to-base contact and do not move.
Regardless of the outcome, any units you have caused a point of damage to in Melee are now Disordered. They remain Disordered until the end of their following turn. These units cannot use any form of Ranged Attack and lose the ability to Fly. So even if you have no real chance to Rout a unit, sometimes it’s well worth it to go smack them in the face!
Proposing an Engagement
There are a week’s worth of blog’s that could be written on the nuances of Engagement in the Melee Phase. Pages 18-27 of the Kings of War rulebook will detail the myriad of possibilities your units have when fighting in close combat. For this blog, let’s look at some of the more important factors of gameplay that showcase the wonderful geometry of rank and flank wargaming.
More often than not, a combat will result in units remaining Engaged. This is what is meant by units still in base contact with an enemy unit. Units remain Engaged with one another until one of the units Routs, Disengages in its Movement Phase, or one of the units Counter Charges a different unit with which it was Engaged.
A Counter Charge is a special type of Charge Order that is given to a unit that is ‘attacking back’. This order breaks many of the typical Charge order requirements. A Counter Charge can be declared as long as the unit you are attacking was Engaged with you at the start of your turn. You do not need Line of Sight and the enemy does not need to be in your front arc. Simply pick up and place the attacking unit to face the target. As long as there is room to physically fit, you may Counter Charge. A special benefit is that Counter Charging units are not Hindered, but will still be Disordered if they took damage in the prior Melee Phase.
Sometimes, one of your units will want to Charge an enemy unit in a different facing from a unit that is already Engaged with it. This is a common ‘hammer and anvil’ strategy. By locking down the enemy with one of your units, it provides you time and opportunity to position another unit into a different arc, commonly a flank or rear and Charge on a later turn. If your friendly unit would otherwise block your Charge, you can declare a simultaneous Counter Charge and Charge against the same target unit, allowing the blocking unit to side and make room for the new Charger. This sort of thing works particularly well with defensive units with high nerve combined with faster, or Nimble units that can plan ahead for a juicy Charge.
Another way to play is by including the Withdraw mechanic. This optional rule makes it so a unit that was Engaged is granted a free 1” backup before it can declare a Charge, Change Facing, Sidestep, Back, or Halt Order. This is primarily used so that a unit that was otherwise stuck in combat will be able to declare a Charge on a new target. The 1” gap gained from Withdraw will allow certain unit sizes to perform a pivot that ends clear of the unit they were originally Engaged with. This is because a Charge order allows units to move within 1” of enemy units. The other common use is to Sidestep your Engaged unit away, allowing a new unit to come in and fight. The 1” gap allows the originally Engaged unit to end its Movement 1” away from enemies. Watch out if the unit that Sidesteps is Shambling as they could potentially be Surged back in! Any unit that makes a Withdraw will suffer a -1 to hit penalty on any Attacks it rolls in the following Melee Phase. This stacks with Hindered or Ensnare so be careful when planning these maneuvers. Some units in the game, particularly those with a width and depth of the same number (e.g. 75x75mm), can do some of these moves without Withdraw and no -1 penalty, so stay sharp!
Primer Complete
With that, you’re now well equipped to get started on your Kings of War journey. The greatest selling point for this game is actually putting some models down and to start playing. It’s a rich and rewarding experience that you will find easy to pick up but challenging to master. The nuances of movement, magic, and combat will all come together in no time. Soon you’ll be plotting your own strategies for each of the scenarios and building lists for multiple point levels.
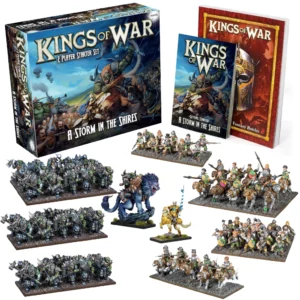
Getting started with Ambush is absolutely the way to go. It allows you to explore Kings of War at an easy entry point and low model count where you can build and customize a collection from there. Creating your own paint scheme, thinking about how your army fits into the world of Pannithor, and making dynamic multibases are all part of the fun. Be sure to check out the wonderful range of Mantic miniatures designed to bring the world to life and inspire your creativity in the hobby. We look forward to seeing you across the table with your army, ready to do battle!