


Kings of War Army Guide: Dwarfs
13th Feb 2017
Rob Burman
Hi everyone, it’s Bensome here from the Direct Misfire podcast.
It may just be me, but I’ve been noticing a lot of talk amongst newer players about Dwarfs lately; asking for opinions on certain builds, which units are good and “what should I take?”
I thought I might throw in my two bob and give you my musings on some safe, effective unit choices for the newer player. If you’re after a more in depth analysis of the entire army, you could also download our Dwarf Army Review and have a listen.
The dwarf army as a whole is a slower moving but highly resistant and reliable force. The choices available to a dwarf player are wide and varied allowing many different and effective builds. I’ve seen the all cavalry army, the gun line, the massed ranks of infantry, the monster-mash, and even the Multiple Small Unit (MSU) list decked out with Throwing Mastiffs. So I guess it’s no wonder that when a fresh dwarf player is confronted with options available, they ask for help.
So here I am to save the day! Below are my top three choices for the new dwarf player:
BERSERKER BROCK RIDERS
The first and most obvious choice… Berserker Brock Riders.
These crazy badger-riding dwarfs are an excellent unit for any list, be it as a troop or regiment. They bring the much needed speed the dwarfs generally lack and can also pack quite the punch if left unhindered.
In addition to their speed and the high amount of attacks (not to mention Thunderous Charge and Vicious) they are also fearless – giving you piece of mind that they are never going to be waivered. As a result, it forces your opponent to focus fire onto unit in an attempt to cause enough damage to rout them, this in turn spares the rest of your army allowing them more time to move into position.
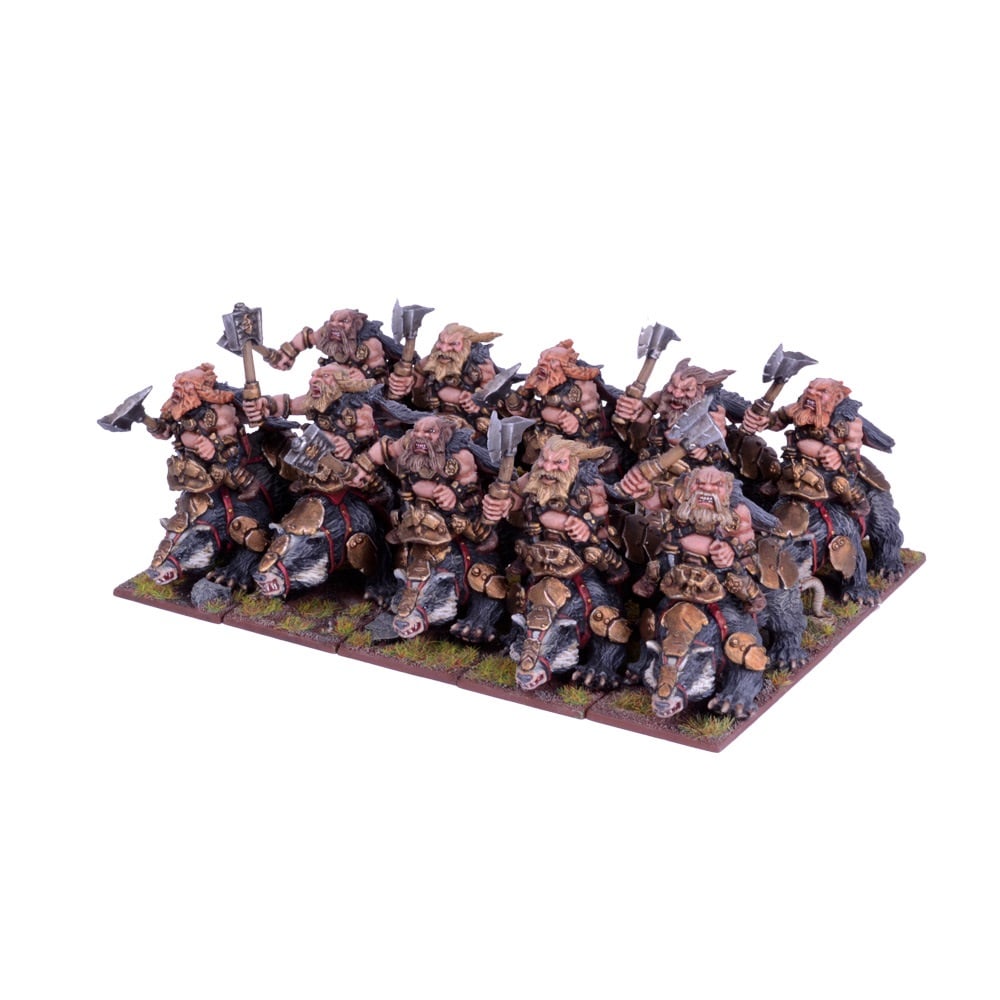
A troop of brocks are great for removing small units and clearing the way of chaff as well as hunting war machines and squishy lone characters. That’s not to say they shouldn’t fight hordes of troops though. Just make sure you can pull off a flank charge if you’re that way inclined - 26 attacks for a troop of cavalry? Yes please!
Requiring less finesse, the regiment of Brocks can take on most other units in a direct charge as long as they are unhindered. Keep in mind that this unit is a big threat to your opponent and they’ll likely stall them, attempt to shoot them off the table or pre-empt the charge with fast moving units of their own.
As for which artefacts to pop on them? You’re spoilt for choice. I’ve found that the Brew of Haste is a good little piece of kit to increase the charge range which often catches people out. The Caterpillar potion is another solid choice allowing the brocks to move at the double through terrain and avoid being hindered.
EARTH ELEMENTALS
My second choice… Earth Elementals.
These sexy rock monsters can stand as a road block to your enemy. As with the Brock Riders the Elementals are fearless. Unlike the Brock Riders though, the Elementals are Defence 6! Teamed up with a Healing Charmed hero, these pet rocks should be able to hold against everything but the most egregious of damage dealers.
While they can be perceived as slow, with only movement 5 and Shambling, their speed isn’t a factor to worry about as playing the role of road block means they only need to get into a good spot and wait for the enemy to attempt to crack through.
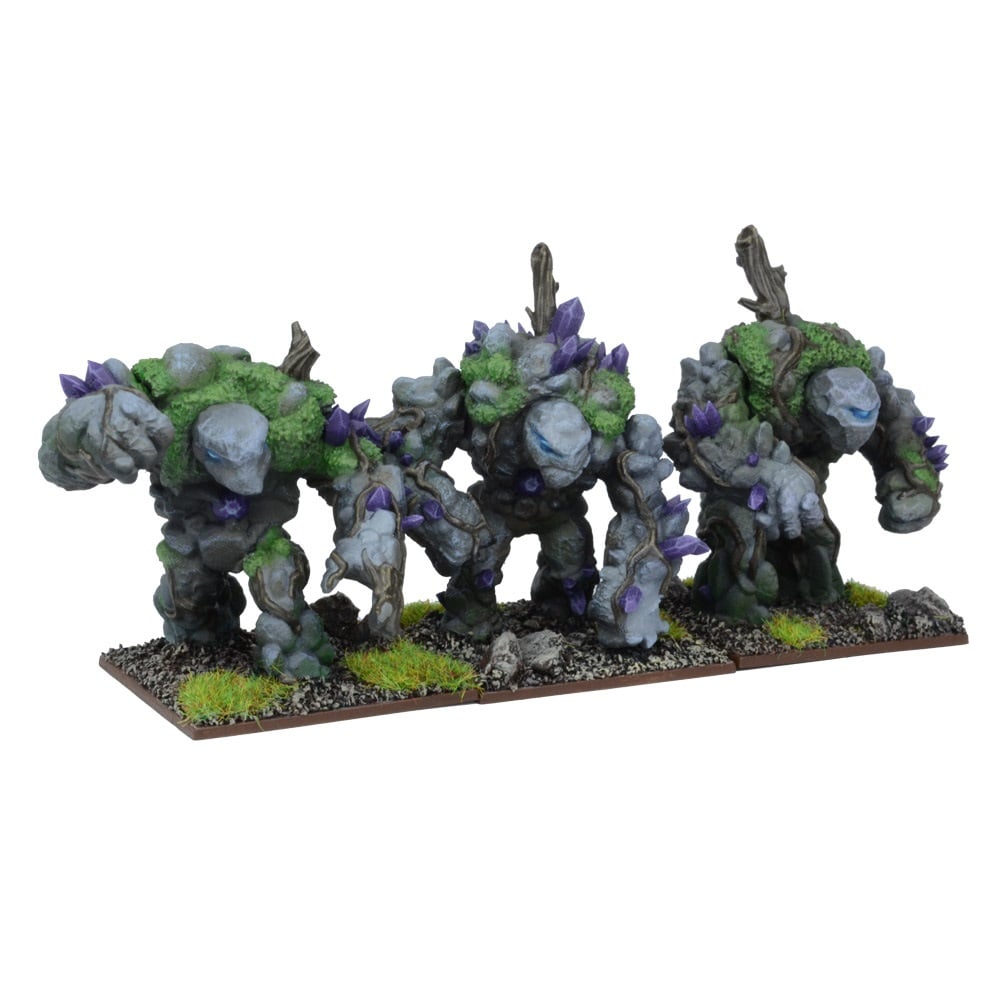
Both sizes of Elementals, regiment and horde are viable, with the horde just being a more offensive unit (as it has more attacks, naturally) and are able to be surged into a flank easier. Same goes with the Monster variant, the Greater Earth Elemental; while it has fewer attacks, it has a higher nerve and smaller unit footprint, allowing surge tricks to be more easily attained (just make sure to hire a Stone Priest so you CAN surge ;) )
I wouldn’t suggest popping an artefact on the Elementals unless you have some points spare: they really don’t need it. If you had to twist my arm though, I’d probably put the Diadem of Dragonkind on a horde so that they could have a ranged attack longer than their charge distance (or use the breath weapon on a unit before surging them into the flank of the same unit *evil chuckle*). Another good option would be the Brew of Courage to make the Elementals even harder to shift.
IRONBELCHER ORGAN GUN
My last and by no means least choice… the Ironbelcher Organ Gun.
One of the shorter ranged war machines available at 24”, the Organ Gun compensates by having a high number of Piercing 2 shots. This is made even more effective when a Warsmith hero is nearby as the Organ Gun then gains the Elite rule, making the package a deadly little battery.
You may think that 24” is a little short to be able to get in many rounds of shooting, but if positioned correctly (not in the far corners of your deployment zone) you should be able to find a target to destroy every turn.
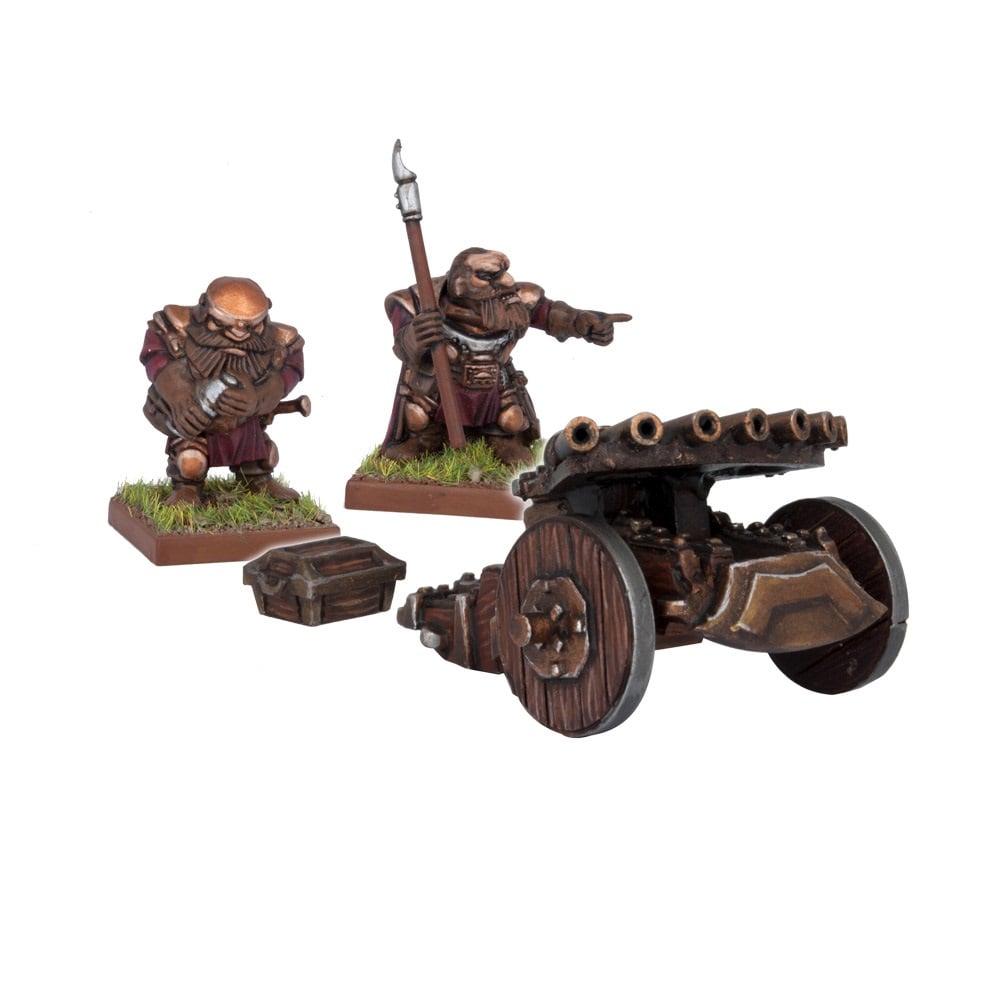
Deployment can be the biggest factor for success with these machines as while they may not look like a normal cannon or catapult, the organ gun still has the Reload rule; you don’t want to be wasting a turn re-positioning because your firing angle was a little off.
The Organ Gun, though not specifically designed to take out high defence units (unlike the Cannon), can still pepper those targets for reasonable results. Damaging on 4+ or 3+ vs Def 6+ and 5+ is still a decent chance to substantially damage such units. That said, the prime target for the Organ Gun is the swift light to medium cavalry (those with defence 3+ or 4+) or similar infantry as you’ll be damaging on 2+ and those particular units generally have an average rout value of 16. A decent round of shooting from one Organ Gun should give you a pretty good chance of taking them off the board.
While not essential, the presence of a Warsmith makes the organ gun more reliable (giving Elite if nearby) but you need to factor in the points value – is it worth it to take a Warsmith for one gun? Probably not. Two guns? Most definitely!
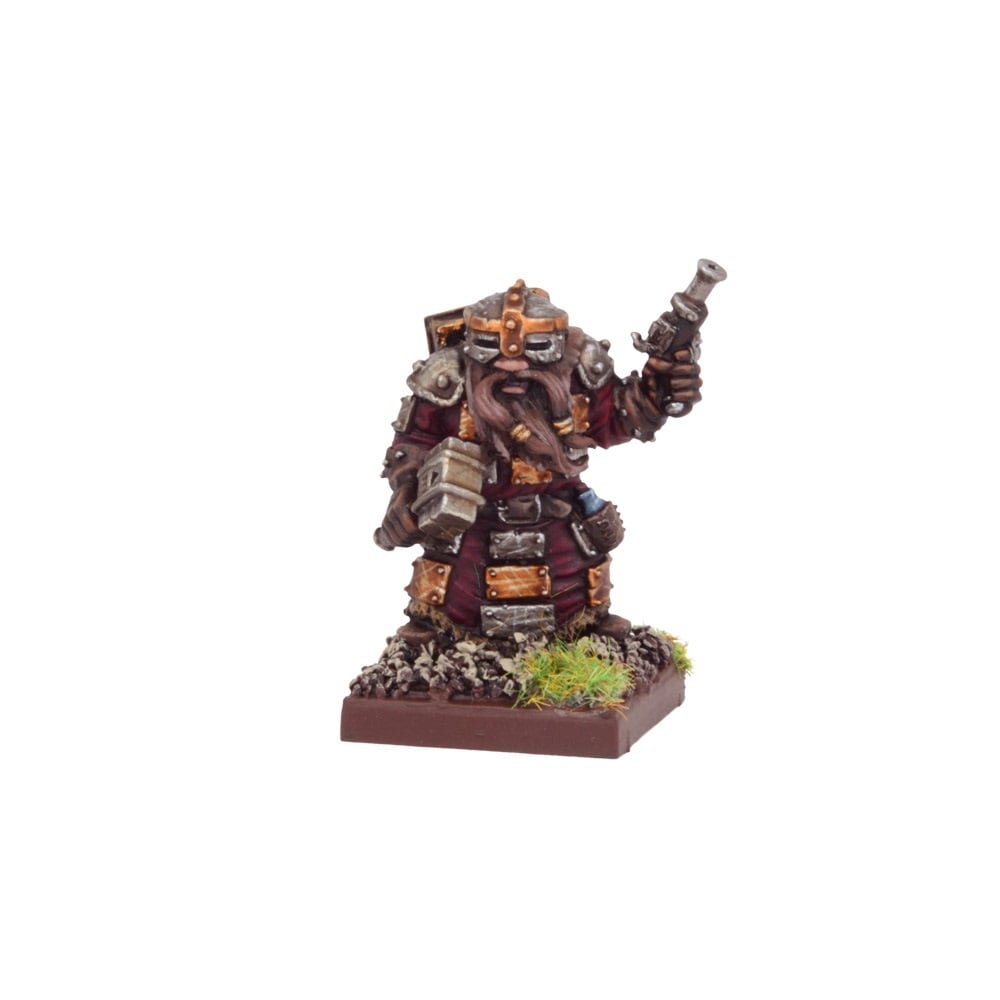 The last thing I’ll say about the Organ Gun, as with most war machines, is to try to keep your firing lines clear. You don’t want to be shooting at an enemy that has cover if you don’t have to. If you’re taking a Warsmith, don’t be afraid to sacrifice him if it means keeping the gun alive.
If you notice your opponent is lining up a charge, try and pop the little fella just over six inches in front of the gun (or if you have the movement, charge the enemy with him). Yes he will probably lose the fight, but he should give you enough room to let loose another volley of organ gun fire.
There you have it. My top choices for the beginning dwarf player. Like I’ve stated earlier, the dwarf army list is diverse and allows for many varied, effective lists so don’t be too afraid to experiment. Most of all, have fun with it!
The Direct Misfire podcast is a great Kings of War-themed podcast, with army guides, battle reports and lots more. You can listen here.