How to win in Kings of War with Abyssal Dwarfs*
24th Feb 2020
Rob Burman
Today we’re handing over blog duties to internet legend, Andy ‘2D6’ Ransome. Famed for his striking choice of clothing and in-depth YouTube battle reports, Andy is also currently the number one Abyssal Dwarf player in the UK. So, with the revised Abyssal Dwarf army currently up for pre-order on the website, we asked Andy to give us some tips and tactics for new (or just really rubbish) Abyssal Dwarf players. Andy, take it away…
When somebody mentions Abyssal Dwarfs, you could be forgiven for immediately thinking of incredibly tough lumbering units backed up by a devastating artillery barrage. You'd only be thirty-three percent correct, however, because this is an army list that possesses a lot of options and flexibility. I like to break it down into six distinct sections, which roughly coincide with keywords in the unit profiles. There are plenty of synergistic crossovers, so don't feel bound to this outline.
THE UNKILLABLE WALL OF DOOM!
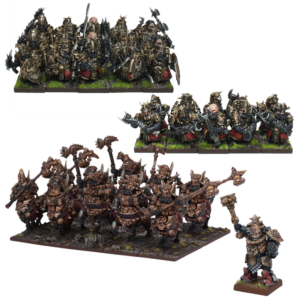
Units: Lesser Obsidian Golems, Greater Obsidian Golem, Immortal Guard, Infernox, Hellfane, Ironcaster, and Hexcaster
These units provide a high defence wall of unwavering solidity. Avoid getting multi-charged and most of these units can take a frontal assault from almost anything. A nearby Ironcaster will provide Inspiring to all the Hellforged units, in addition to being able to Heal them (it's worth looking at artefacts to boost this, since getting back those sweet succulent Defence 6 points of damage can be very significant). His most powerful ability could well be Surge, so you should always be looking to set up flank attacks with your Shambling units. Encourage the enemy to charge into the centre of your line and this should leave them open for some juicy manoeuvre.

Remember that you can Surge a unit into combat after they use a ranged attack, so the Charnox upgrade for the Lesser Obsidian Golems is quite a tasty prospect.
Also, don't underestimate the power of the Greater Obsidian Golem's base footprint. Being a perfect square and a Shambling unit can lead to some very sneaky sideways Surging shenanigans.

The Hexcaster can help this section of the army with the Weakness spell, making it even more unlikely that your enemy will be able to kill one of these units.
KABOOM!
Units: Angkor Heavy Mortar, G'rog Light Mortar, Katsuchan Rocket Launcher and Decimators (with upgrade)
Nothing too complicated here. Make sure you take note of the relative heights of your army and the enemy, so you know which units you'll be able to see over to your target (also keep in mind which of your weapons ignore cover). The Angkor Heavy Mortar may well be the most feared War Engine in Pannithor, and with good reason.

If your opponent has significant threats to these machines, such as fast Individuals, you may want to consider either spreading them out to keep them alive longer, or bunching them together to make them easier to defend with your own units. All in or all out.
FLY, MY PRETTIES! FLY!
Units: Great Winged Halfbreed, Ba'su'su the Vile and Gargoyles
Many armies have access to a large powerful flying Titan, but the Great Winged Halfbreed is among the scariest. Regeneration is quite a big deal, especially since you should be able to use your speed to avoid the hardest-hitting enemy units and stay alive. Threaten enemy flanks and watch them reposition their entire battle line in sheer terror.

We also have access to Ba'su'su the Vile, one of the game's more potent Individuals. Perfect for swooping down on enemy units that may or may not have just taken massive damage from artillery, or joining in with a charge from a different angle to add some extra bite to the attack.
Gargoyles are a fairly standard flying chaff unit. A stiff breeze will kill them, so whatever you do keep them out of sight of enemy shooting. They can be used to clog up the enemy for a turn, preventing multi-charges, pinning units back, or just keep them hiding in reserve until the time is right to jump onto a vital objective late in the game.
Any of these could theoretically be used for War Engine hunting, but you'll have to decide if it's worth their points cost to do so at any given time.
CHARGE!
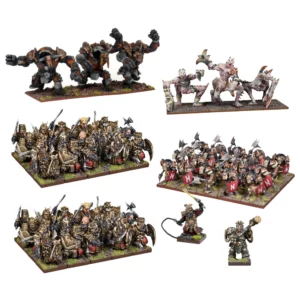
Units: Halfbreeds, Grotesques, Halfbreed Champion and Grotesque Champion
These units hit hard. They're pretty fast, but that doesn't necessarily mean you want them on the front lines.When using Halfbreeds, you NEED to make sure you're hitting the enemy before they hit you. Mediocre Defence means they are very much a glass cannon. This is reflected in their cost being slightly lower than more survivable heavy cavalry in the game. Keep them out of harm's way until it's time to kick butt.

Grotesques are much more survivable, so they are certainly a frontline option. Just be wary that they can be wavered, unlike the units in the Wall of Doom we covered at the start.
Both these units take a serious hit in damage output when they become Disordered or make hindered charges, so make sure you hit first and consider investing in an artefact (Potion of the Caterpillar, Boots of Striding). Oh yeah, and remember not to charge head-on into a wall of spears.
SLAVING OVER A HOT VOLCANO!
Units: Slave Orcs, Slave Orc Gore Riders and Slavedriver
Abyssal Dwarfs have access to fairly inexpensive Orc slaves. With so many juicy options for expensive death-dealing units, you may sometimes find yourself looking for cheap ways to boost your unit count. Orc slaves do exactly what you'd think. They provide bodies for the enemy to chew through, while also being somewhat dangerous on the counter-attack. Keep a Slavedriver nearby if you want to give them a little boost.
HI-HO, HI-HO, IT'S OFF TO WAR WE GO (SLOWLY)!
Units: Blacksouls, Abyssal Berserkers, Decimators, Immortal Guard, Overmaster and Hellfane
It wouldn't be a true Dwarf army unless you could field a line of painfully slow beard-bearers. Any of these units can benefit from the Overmaster taking an aura of Strider upgrade, especially if you're planning on camping out in difficult terrain while the (presumably much faster) enemy advances towards your lines. Just remember that while it is tempting to set up Strider units in terrain, if you ever want to leave the comfort of the forest you will be doing so incredibly slowly.

All these units will also benefit from being near a Hellfane with the Brutal aura, if you're looking for a centrepiece for your line of foot troops.
The Berserkers provide a slightly faster infantry option if you're keen on actually moving anywhere, plus they hit pretty darn hard. Just don't let them become pin cushions with that comically low Defence stat.
IN CONCLUSION!
The best Abyssal Dwarf armies will use elements from multiple "wings" of the army list, providing a balanced and devastating attack that is fiendishly difficult to kill. While you might be tempted to put all your severed heads in one basket, we have so many options that you'd be a fool not to at least dabble in the other options available to you (especially with the extra spicy new resin models arriving soon).
*wins not guaranteed